A whole new kind of club…stacked!

Triple Decker Roast Beef with Horseradish Kewpie Mayonnaise by Modern Day Forager

An all-time diner favorite, this mile-high club is our last sandwich this week, with a HG twist.  This triple decker tower of ingredients layered with artisan bread is truly a showstopper.

Reclaim dinner this week, with this rich and satisfying robust sandwich.  Who says you can’t serve sandwiches for dinner?  Don’t just think of sandwiches for livening up lunch.  With school in full swing, and everyone’s hectic schedules this fall, we decided to make Heather’s go-to  weeknight staple, her take of the roast beef club.

Triple Decker Roast Beef with Horseradish Kewpie Mayonnaise by Modern Day Forager

The clubhouse or also known as the Dagwood is on the rise, here at MDF.  Heather built this decadent meaty sandwich with style, care and flair.

First and foremost, you should know that Heather goes to great lengths to curate high-end carefully sourced ingredients, so with that in mind, she started with rich toasted dark rye and it grew from there, slathering our version of Kewpie mayo with the addition of fresh grated horseradish and chopped woodsy rosemary.  Then added fresh crisp greens, juicy ripe plum tomatoes, smooth but slightly tangy Muenster (cow’s milk cheese with a thick orange rind) and mounds of slow roasted, thinly sliced, rosy pink roast beef.

Highly anticipated for this combination of flavors and textures, this beauty was a huge hit in our test kitchen as Heather crafted her three-story stack of goodness for our photo shoot.  At the end of the day, the result was a hearty dinner which was ready in no time, and boy was that a good thing, because boy were we hungry.

Triple Decker Roast Beef Club with Horseradish Kewpie Mayonnaise

Ingredients:

Makes 2 large sandwiches

  • 1/2 pound roast beef
  • 1/2 pound Munster cheese – sliced very thin
  • Horseradish Kewpie Mayonnaise (recipe below)
  • Leaf Lettuce
  • Roma Tomatoes – sliced thin
  • 6 slices or Dark or Marble Rye Bread
  • Tooth picks – you will need them!

Directions:

  1. Toast the bread and spread horseradish Kewpie mayonnaise on 3 sides.
  2. Build the sandwiches–first with a layer of lettuce, then tomato, then cheese, then roast beef.
  3. Top with another layer of bread and add to that lettuce, then tomato, then cheese, then roast beef and the last piece of bread.
  4. Add toothpicks to help hold together.  Find someone to share this with, it’s a big sandwich!

Kewpie Horseradish Mayo

Ingredients:

  • 1/3 cup MDF Kewpie mayonnaise
  • 2 tablespoons prepared white horseradish
  • 1 teaspoon chopped fresh rosemary
  • Salt and freshly ground pepper

Directions:

  1. Whisk Kewpie mayo, horseradish and rosemary in small bowl and season with salt and pepper.
Recipes by Rj of Urban Table
Photo Styling & Art Direction by Traci of Urban Table
Photography & Art Direction by Heather of Heather Gill Photography
Modern Day Forager

Modern meets Old Fashioned…

Old Fashioned Pastrami Sandwich from Modern Day Forager

Modern’s Old Fashioned Pastrami on Rye

Paying tribute to an old fashioned deli masterpiece.  One of the simplest, most familiar, sandwiches is pastrami on rye, and for many, it is the king of all sandwiches.

Foolproof, this  rich silky, garlicky, peppery and piled sky-high pastrami needs no bells or whistles.  The magic happens, when crafting the meat– curing, spicing, crusting, smoking and steaming.  Then, all that is needed is soft chewy seeded rye, one that has some sourness to it, along with a dusting of cornmeal on the bread’s surface.  The bread must be warm (a must) and is the perfect vehicle to add a heaping helping of Modern’s Stout Mustard, which never disappoints.  So curate high-quality meat or make your own.  This iconic sandwich is as straight-forward as it gets, but provides a taste that you remember and want over and over, keeping  you coming back for more.

I could not blog about pastrami without mentioning my favorite place in the world to have this sandwich, and it is not even in NYC.  For me, Langer’s in LA, downtown LA no less, is  truly the very best.  It is a pastrami mecca, and the pastrami sandwich is taken very seriously at this landmark restaurant.  So, if you are ever in Los Angles, this is a must-have sandwich.

Langer’s Deli

704 S. Alvarado Street

Los Angles ,90057

+ 213.483.8050  langersdeli.com

Old Fashioned Pastrami with Stout Mustard by Modern Day Forager

Modern’s Old Fashion Pastrami on Rye

Ingredients:
  • 12 ounces thick cut pastrami  (Purchased from your local deli or make your own, recipes below)
  • 4 slices of rye bread
  • 2 tablespoons MDF Stout Mustard
  1. Place pastrami in a skillet over medium high heat.  Cook until fat of pastrami starts to steam, cover with two slices of rye bread.  Steam bread to warm, remove bread, flip over pastrami.   Cover with remaining rye bread and steam.
  2. On your work surface, place 2 slices of steamed rye bread and spread each with 1 tablespoon MDF Stout Mustard.  Layer each bread slice with 6 oz. thick cut pastrami; place two remaining slices of bread on top of pastrami.
  3. Enjoy! 

Variations:

  • Layer pastrami, sautéed onions and Thousand Island dressing on rye bread.
  • Top with house made cole slaw
  • Swiss Cheese
  • Horseradish sauce
  • Slice Pastrami thin and pile high

Home-Cured Beef Pastrami by Michael Ruhlman on Ruhlman.com

Ingredients:

  • 6 ounces or 3/4 cups kosher salt
  • 3 ounces or ½ cup sugar
  • 2 teaspoons pink salt, optional
  • 5 cloves garlic, smashed with the flat side of a knife
  • 4 tablespoons pickling spice
  • 1 5-pound beef brisket, the more fat it has the better

Rub:

Ingredients:

  • 1 tablespoon peppercorn, toasted and ground (or as needed)
  • 1 tablespoon coriander seed, toasted and ground (or as needed)

Directions:

  1. In pot large enough to hold brisket, combine 1 gallon/4 liters of water with kosher salt, sugar, sodium nitrite (if using), garlic and 2 tablespoons pickling spice.  Bring to a simmer, stirring until salt and sugar are dissolved. Remove from heat and let cool to room temperature, then refrigerate until chilled.
  2. Place brisket in brine, weighted with a plate to keep it submerged; cover.  Refrigerate for 2 days if it’s thin, a third day if it’s thick.
  3. Remove brisket from brine and rinse thoroughly.  Refrigerate it for another day uncovered (this is best, to let cure equalize, but if you can’t wait, that’s ok too).
  4. Combine the pepper and coriander and coat the brisket with it.   Smoke and cook the brisket, till tender, as described above.  Slice thinly to serve.  This will keep for a week in the refrigerated.  Steam it to reheat or reheat covered in a microwave (gently).

Pickling Spice

Ingredients:

  • 2 tablespoons black peppercorns
  • 2 tablespoons mustard seeds
  • 2 tablespoons coriander seeds
  • 2 tablespoons hot red pepper flakes
  • 2 tablespoons allspice berries
  • 1 tablespoon ground mace
  • 2 small cinnamon sticks, crushed or broken into pieces
  • 2 to 4 bay leaves, crumbled
  • 2 tablespoons whole cloves
  • 1 tablespoon ground ginger

Directions:

  1. Combine peppercorns, mustard seeds and coriander seeds in a small dry pan.  Place over medium heat and stir until fragrant, being careful not to burn them; keep lid handy in case seeds pop.  Crack peppercorns and seeds in mortar and pestle or with the side of a knife on cutting board.
  2. Combine with other spices, mix.  Store in tightly sealed plastic or glass container.

Pastrami Recipe for use with Smoker and Cherry Wood

Ingredients:

  • 1/2 cup kosher salt
  • 1/2 cup brown sugar
  • 1/4 cup black peppercorns
  • 4 tablespoons coriander seeds
  • 5 cloves garlic, smashed
  • 2 bay leaves
  • 5 to 6 pound brisket flat, trimmed
  • 1 qt beef stock
  • 2 12 ounce bottles of beer
  • 3/4  gallon cold water
  • 4 tablespoons pickling spices
  • 4 bay leaves
  • 2 tablespoons additional juniper berries
  • 2 tablespoons additional black peppercorns

Directions:

  1. Place peppercorns and coriander seeds in a grinder and grind until coarsely chopped.  Mix the salt, sugar, garlic, and ginger with the seasonings from the grinder.
  2. Reserve 1/4 of the seasonings.  Rub the flat thoroughly on all sides with seasonings.  Wrap in plastic wrap, then aluminum foil.  Place in a glass pan in the refrigerator.  Turn daily for at least one week, up to two weeks is better. Remove brisket from all wrappings.  Place on rack in pan so it can drain, and put uncovered in refrigerator  overnight, until very dry.
  3.  Prepare smoker with cherry wood at lowest temperature while still producing smoke.   Place cold flat in the smoker. Smoke for 3 hours,
  4. Remove  from smoker and place in a large dutch oven.  Cover  with  beef stock, beer and water.  Add the reserved rub, the pickling spice, the bay leaves, the additional juniper berries, and the additional black peppercorns.
  5. Simmer covered until tender about 3 hours.
  6. Remove from pot and slice. (cut across grain)
Recipes by Rj of Urban Table
Photo Styling & Art Direction by Traci of Urban Table
Photography & Art Direction by Heather of Heather Gill Photography


Modern Day Forager

Build a better sandwich


There is so much more to making a sandwich than slapping all sorts of ingredients between two slices of bread.  This week, we will take the sandwich and elevate this portable package to new heights.  Is there an art and a formula to making a great sandwich?  We sure think so.

With attention to detail, carefully sourced ingredients, and a little extra time, you can make an unbeatable sandwich.  First, it all starts with the bread… should it be crusty, crispy or chewy?  The bread is the blank slate, the perfect landscape, think about your ingredients, are they right for your bread, you don’t want a soggy vessel.  Look for hearty, healthy, local artisanal bread with texture.  Next, choose high quality protein and fresh, local produce.   Add vegetables such as cucumbers for an extra crispness then try apples or pears for added sweetness and crunch.  Finally don’t forget to spread on the house made condiments, which are easy to make and you control what goes in your spreadable.  Great bread, great ingredients, well-thought out flavors, textures and combinations equal a great sandwich.

Argentinian Steak Sandwich

Skirt Steak with Chimichurri by Modern Day Forager


The steak sandwich has taken many forms over the years, in different parts of the country and all over the world.  It has also spawned many other tremendous sandwiches like the cheesesteak, the French dip, my personal favorite the Italian beef and so many more.  The basis for them all is a good piece of meat (or a well marinated and/or seasoned one) and great bread.  It only figures that a country like Argentina that loves its steak would also be home to one of the most flavor packed steak sandwiches in the world here is our take:

Ingredients:
• Skirt Steak
• Chimichurri–MDF Chimichurri Recipe
French bread loaf of roll

Directions:
1.  Rub skirt steak with Chimichuri and marinate for at least 2 hours. (we do ours overnight in a zip lock bag)
2.  Grill to desired doneness. (no more than med-rare)
3.  Slice on bias against the grain about 1/2 inch thick.
4.  Shingle on bread and top with more chimichurri.
5.  Serve with more chimichurri as a dip.

Variations:
• Add grilled red pepper
• Serve with mayo, lettuce and tomato
• Serve with sautéed onions

Skirt Steak with Chimichurri by Modern Day Forager

Note:
For a great side dish toss chimichurri sauce on potato wedges and roast in 400°F oven until just tender, about 40 minutes.

Grilled Salumi and Cheese with Mustarda

sandwich5


By all accounts the good ‘ol American style grilled cheese sandwich has been around since the 1920s and there are versions of this standard in just about every culture around the world.  We love a good grilled sandwich as much as anyone so this is our fusion of a grilled cheese, a Croque-monsieur and a Panini. The key, to the perfect grilled sandwich is that the flavors and textures all compliment each other and we think this one does just that…

sandwich6

Ingredients:

Directions:

  1. On one piece of bread, spread the mustarda in an even layer.
  2. Fan the salumi slices over mustarda.
  3. Lay the cheese on top of the salumi.
  4. Top with another slice of bread.
  5. Spread 1/2 teaspoon butter on the top slice of bread.

*Repeat this for the remaining three sandwiches.

  1. Heat a large non-stick skillet over medium high heat and add the remaining butter to the pan.  Once the butter is foaming, place the non-butter side of the sandwich in the pan. (we used our Panini maker)

Heat for 5-6 minutes until golden brown and the cheese begins to melt.  Using a spatula, flip the sandwich to the other side for another 3-4 minutes until golden brown and the cheese is completely melted.

Recipes by Rj of Urban Table
Photo Styling & Art Direction by Traci of Urban Table
Photography & Art Direction by Heather of Heather Gill Photography

Modern Day Forager

Modern’s take on Mustarda and Chimichurri

Spicy Mustarda by Modern Day Forager

This cherished (Sicilian) Italian condiment has many faces, made with fruit, (fresh, dried or candied) sugary syrup, wine and the essence of mustard, it is quite versatile.  The specialty dish, Bollito Mistro in northern Italy, traditionally served mustarda along side this hearty stew (similar to the French Pot-au-feu) as a celebration dish in the fall and winter.  It has gained popularity and made its way as an accompaniment on charcuterie, crusty breads, cheese boards, spooned over creamy polenta and it is equally delicious, crowned on poultry, game and fish.  It even adds a depth of savory piquancy and sweet flavor as a quick pan sauce or poured over ice cream.  Our favorite way to enjoy mostarda is to add it to a grilled salami and gruyere cheese sandwich, the mostarda just adds a richness and a spicy-sugary balance to the saltiness of the cheese and salami.  Yum!

 Spicy Mostarda

Ingredients:

• 1/2 cup dried apricots
• 1/2 cup dried cranberries
• 1/2 cup dried figs
• 1/2 cup dried cherries
• 1 shallot, minced
• 1 1/2 teaspoons minced crystallized ginger
• 1 cup dry white wine
• 1/4 cup honey
• 2  firm Bartlett pears, cubed
• 2 tablespoons of yellow mustard seeds
• 1 tablespoon mustard powder
• 1 teaspoon red pepper flakes
• Coarse salt and freshly ground pepper

Directions:

1.  Place the dried fruits, shallot, ginger, wine and honey in a medium saucepan and simmer for 10 minutes.
2.  Add pears, mustard seed and mustard powder and continue simmering for another 10 minutes.  (pears should soften but still hold shape)
3.  Season with red pepper flake, salt and freshly ground black pepper.
4.  We like our mustarda chunky here at MDF but if you prefer a thinner consistency you can puree part half the mixture and then mix for a medium chunk or puree the entire batch for a jam like consistency.
5.  Let the mustarda cool, place in a sealed container and store in the refrigerator.

Chimichurri Sauce by Modern Day Forager

This acclaimed quintessential Argentinean sauce, chimichurri compliments grilled meats perfectly and is a crowd pleaser you should try for your next summertime gathering.  This fairly spicy sauce is bright, fresh and herbaceous with a garlicky, tangy punch.  Made of parsley, oregano,  garlic, shallots, vinegar, fresh lemon juice, red pepper flakes, and olive oil, this sauce really needs time to meld all of the flavors together, so make a day or two ahead of time, before you serve it.  Not only can you present this table side but if you don’t have the extra time to make it ahead, it also makes a easy and quick (that day) marinade for vegetable kabobs, beef, lamb, poultry,  fish and will really pop and heighten the flavor.

 Argentinian Chimichurri Sauce

Ingredients:

• 1 cup chopped Italian parsley
• 5 cloves garlic, chopped
• 1 teaspoon salt
• 1/2 teaspoon freshly ground pepper
• 1/2 teaspoon red pepper flakes
• 2 tablespoons fresh oregano leaves
• 1 shallot
• 3/4 cup olive oil
• 3 tablespoons sherry vinegar
• 3 tablespoons lemon juice

Directions:

1.  Place all chimichurri sauce ingredients in a blender or food processor and pulse until well chopped, but not pureed.
2.   Store in an airtight container in the refrigerator.

Plus it makes an incredible cheeseburger topping.  Try adding it to soups, stews and rice dishes, as well.

Recipes by Rj of Urban Table
Photo Styling & Art Direction by Traci of Urban Table
Photography & Art Direction by Heather of Heather Gill Photography

MODERN DAY FORAGER

An ode to ketchup and mustard…

We all know that ketchup and mustard are the king and queen reigning the condiment world, while we know there is something nostalgic about commercial brands, don’t leave it in the hands of Heinz and French’s.  Embrace making your own handcrafted customized concoctions.
Ketchup by Modern Day Forager


Making ketchup is really quiet simple, and the flavor combinations are endless.  So why not?  If you have an abundance of tomatoes from your garden this summer, why not use these juicy orbs of goodness and build a better ketchup?

MDF FARM FRESH KETCHUP

Ingredients:

  • 1/4 cup Olive oil
  • 1 red onion, chopped
  • 1/2 small bulb fennel, chopped
  • 1 stalk celery, chopped
  • 1 tablespoon fresh ginger, peeled and chopped
  • 2 cloves garlic, minced
  • 1/4 teaspoon red pepper flakes
  • 1/4 cup fresh basil, chopped
  • 1 tablespoon coriander seeds
  • 2 cloves
  • 1 teaspoon salt
  • 1 teaspoon freshly ground black pepper
  • 3 pounds fresh tomatoes (experiment with your favorites)
  • 1 1/2 cups filtered water
  • 1 cup red wine vinegar (3/4 cup if you don’t want ketchup tangy)
  • 1/3 cup brown sugar

Directions:

  1. Place the first 12 ingredients in a large pot over a medium-low heat for 15 minutes stirring often.
  2. Add the tomatoes and 1 1/2 cups of water.  Turn heat to medium-high stirring often, until liquid is reduced by half.
  3. Pour mixture into a food processor and process until smooth, then pour mixture through a mesh sieve into a clean pot.
  4. Over medium heat stir in red wine vinegar and brown sugar, and reduce to the thickness you desire.
  5. Cool and then store in refrigerator.

If you prefer a chunky style, just omit the sieve step.

Stout Mustard by Modern Day Forager

Don’t hold the mustard or cut the mustard, make mustard!  This top dog condiment is surprisingly a cinch to make.  However, there are a few basics you need to understand about the process for making really good quality mustard.  First, the seeds need a good crushing and grind, and the key here is to add cold liquid (cold stout in this recipe) to add moisture to the mustard seeds.  Mustard gets its bite when the cracked seeds release volatile oils, much like capsaicin, the “hot” in chile peppers and when mixed with the liquid, the result is pungent and spicy.

Second, heat will temper the chemical reaction (much like cutting a onion) so, hot mustard, cold liquid, warmer liquid a more mellow mustard.  Also, in addition of the cold liquid remember that adding an acid is crucial to the recipe.  If you don’t add the acid, the mustard will lose its bite over time.  Adding vinegar, for instance, will stop and set the chemical reaction in place.

Mustard is extremely versatile, with many variations, it livens up and pairs well with sandwiches, cold meats, cheese, greens, burgers and hotdogs.  Rj and I are from Chicago and the only way to eat a dog is with mustard, sorry ketchup.  It also is a great emulsifying agent/stablizer for salad dressings, marinades, dips, sauces and spreads.  By making your own, you avoid all the goop of artificial flavors, fillers, colors and homemade just tastes better. 

MDF Extra Stout Mustard

 Ingredients:

  • 3 tablespoons yellow mustard seeds, crushed
  • 2 tablespoons brown mustard seeds, crushed
  • 1/3 cup Cold Guinness Extra Stout
  • 2 tablespoons white balsamic vinegar
  • 2 tablespoons honey
  • 1 small clove garlic, chopped
  • 1/4 teaspoon ground allspice
  • 1/4 teaspoon salt
  • 1/4 teaspoon fresh ground black pepper

Directions:

  1. Combine all of the ingredients in a large mason jar, cover and refrigerate overnight.
  2. Pour the ingredients into a food processor or blender and process until the seeds are broken down and you reach your desired consistency, it will thicken the more you process. (You may also use an immersion blender right in jar)
  3. Store in your refrigerator, for up to 2 weeks.
Recipes by Rj of Urban Table
Photo Styling & Art Direction by Traci of Urban Table
Photography & Art Direction by Heather of Heather Gill Photography
Modern Day Forager

A week of Modern’s favorite condiments

Well hello there…

We are back from our much needed break and we are raring to go and just over the moon to get back to our beloved blog.

This week it is all about MDF’S favorite condiments and ramping up the flavor.

Today, people have become much more sophisticated with their food choices, then in the past.  We are willing to experiment, taste new flavors and learn about new cultures.  Usually, it starts with condiments that have gone mainstream.

So, we want to DIY our condiments.  Why?  Well, most of the so-called jars of goodness, we buy, are filled with all sorts of  preservatives, chemicals, fillers, binders and high fructose corn syrup.   Making a small batch from scratch is a much healthier and tastier way to go.

KEWPIE MAYO

Kewpie Mayonnaise by Modern Day Forager


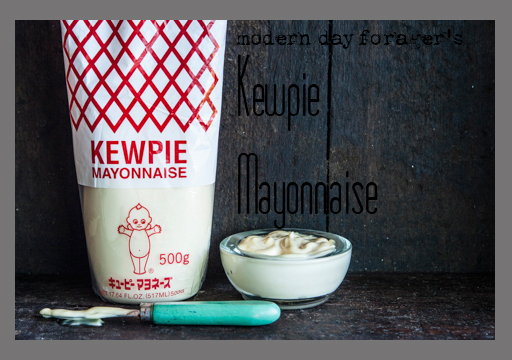
First up, is our take on Kewpie Mayonnaise, the name alone makes for a great conversation.  This Japanese mayo with the kewpie baby doll on the bottle is quite popular among big time foodies, this  is our version without the addition of crystallized monosodium glutamate.

What is interesting about this mayo that differs from homemade and industrial mayo, made here in the states, is that, only egg yolks are used and mainly rice wine vinegar or some other type of vinegar is used to replace the lemon juice.   The end result is a yellowy, creamy, rich, thick, eggy mayo with a  smooth luxurious mouth feel that is quite satisfying.  You have never tasted a mayo like this, and once you do, you’ll wonder how you ever got by without it.

Flavor-packed, this condiment is wonderful on deviled eggs, burgers, sandwiches, dressings, dips, spreads, in egg, chicken and tuna salads and amps up just about everything you put it on or in.  It is also used as a umami flavor in many restaurants across the country and  is a secret ingredient among many chefs.

Modern’s take on Kewpie Mayo

Ingredients:

  • 2 Egg yolks
  • 1 tablespoon rice wine vinegar
  • 1 teaspoon hot Japanese mustard
  • 1/2 teaspoon dashi powder
  • 1 teaspoon Salt
  • 1/4 teaspoon Sugar
  • 1 1/2 cup canola oil

Directions:

1. Place the egg yolks in the bowl of the food processor, add the vinegar and mustard, season with dashi powder, salt and sugar to taste.  Turn the machine on and VERY slowly start to drizzle in the oil until the mixture starts to look like mayonnaise, then a slow steady stream of oil can be added.

2.  Put in the refrigerator for at least an hour to let the flavor develop.

Note:  If the mayonnaise is too thick add a few drops of water or if it is not thick enough, with the machine running, add a little more oil.

Recipe Ideas:

Broiled Mussels with Dynamite Sauce:

(Dynamite sauce also is a great sushi dipping sauce)

24 mussels, steamed
, 1/2 cup Kewpie mayonnaise, 
1 tablespoon Sriracha, 
1 small garlic clove (smashed to a paste), 1 teaspoon sugar.

Preheat broiler on high heat. Remove one half of mussel shell and discard.  Whisk together mayonnaise, Sriracha, garlic, and sugar, then place about 1 teaspoon over each mussel.  Place mussels on a foil-lined baking sheet.  Broil 4 to 5 inches from heat until sauce is bubbling and begins to brown, 6 to 8 minutes.

Ian Knauer is the author of The Farm: Rustic Recipes for a Year of Incredible Food

 Devil Egg: 

Mix yolks with kewpie mayo, minced habanero and freshly ground black pepper.

Dip:

2 tablespoons kewpie mayo and a squeeze of wasabi paste to taste, mix.
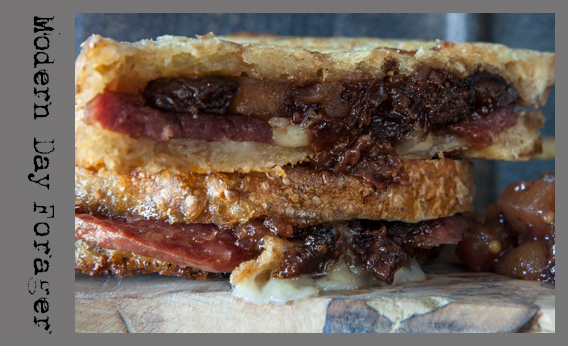
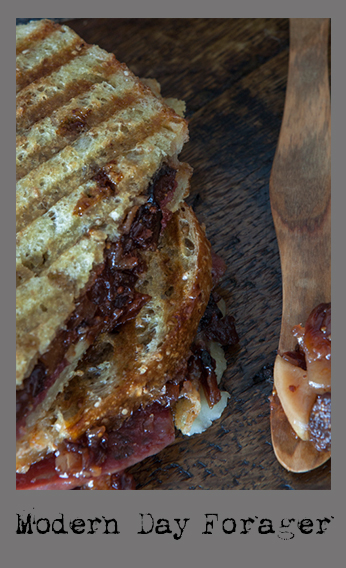
KIMCHI RELISH

Kimchi Relish by Modern Day Forager


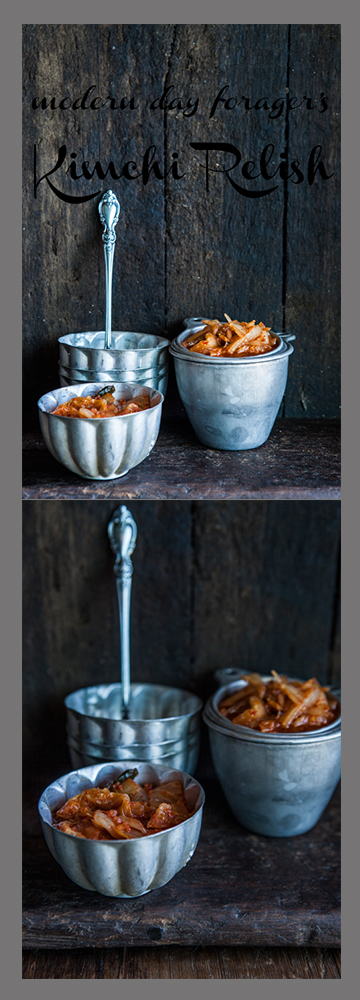
Hints of old fashioned sensibilities but couldn’t be more modern, is our take on kimchi.  Kimchi or sometimes called gimchi is a traditional side dish or topping made of spicy fermented vegetables.  Kimchi is a staple in Korean households and comes in many types and varieties, but the most common are made with cabbage, cucumbers, radish and green onions.  We decided to get our kimchi fix on by making kimchi relish which is chopped finer then traditional chunky kimchi.  We added agave nectar, rice wine vinegar and Sriracha, which gave a slight sweetness and a spicy kick at the same time and just tastes darn good.

This crispy relish works well on burgers , hotdogs, tacos, sandwiches, in soups or stews and on steamed rice or noodles.  It will  stand up beautifully to any steak or add a real punch to a bland chicken dish.  If sunny California is in your near future or on your bucket list, try Kogi BBQ, the famous LA Korean taco food truck.  They do a kimchi quesadilla that will  just knock your socks off.

We love David Chang’s recipe, so we went with his kimchi.

Modern’s take on Kimchi Relish

 Ingredients:

  • 1/2 cup kimchee, thinly sliced (recipe below)
  • 2 teaspoons agave nectar
  • 2 teaspoons rice vinegar
  • 1 teaspoon Sriracha
  • Salt and pepper to taste

 Directions:

  1. Combine kimichi, agave, vinegar and Sriracha in a medium bowl, season with salt and pepper to taste and serve.

 MOMOFUKU KIMCHI

Ingredients:

  • 1 small to medium head Napa cabbage, discolored or loose outer leaves discarded
  • 2 tablespoons kosher or coarse sea salt
  • 1/2 cup plus 2 tablespoons sugar
  • 20 garlic cloves, minced
  • 20 slices peeled fresh ginger, minced
  • 1/2 cup Kochukaru (Korean chile powder)
  • 1/4 cup fish sauce
  • 1/4 cup Usukuchi (light soy sauce)
  • 2 teaspoons jarred salted shrimp
  • 1/2 cup 1-inch pieces scallions (greens and whites)
  • 1/2 cup julienned carrots

 Directions:

  1. Cut the cabbage lengthwise in half, then cut the halves crosswise into 1-inch-wide pieces.
  2. Toss the cabbage with the salt and 2 tablespoons of the sugar in a bowl.  Let sit overnight in the refrigerator.
  3. Combine the garlic, ginger, chile powder, fish sauce, soy sauce, shrimp, and remaining ½ cup sugar in a large bowl.  If it is very thick, add water 1/3 cup at a time until the brine is just thicker than a creamy salad dressing but no longer a sludge.
  4. Stir in the scallions and carrots.
  5. Drain the cabbage and add it to the brine.
  6. Cover and refrigerate.

Though the kimchi will be tasty after 24 hours, it will be better in a week and at its prime in 2 weeks.  It will still be good for another couple weeks after that, though it will grow stronger, and a little more sour and funkier.

 Serving Size:

Makes 1 to 1½ quarts

Innovative recipe of David Chang author of “Momofuku: The Cookbook.”

Recipes by Rj of Urban Table
Photo Styling & Art Direction by Traci of Urban Table
Photography & Art Direction by Heather of Heather Gill Photography

Modern Day Forager

Pink Peppercorn and Goat Cheese Ice Cream

Pink Peppercorn and Goat Cheese Ice Cream

Recipes by Rj of Urban Table
Photo Styling & Art Direction by Traci of Urban Table
Photography & Art Direction by Heather of Heather Gill Photography
Pink Peppercorn Goat Cheese Ice Cream by Modern Day Forager


A sweet  indulgence!  Goat cheese and pink peppercorns are the perfect match for our MDF wheelhouse.  They fit the criteria of being out of the box, something we would want to make over and over again and something we would want to serve and share with everyone.

When thinking about this recipe we had a lot to consider, first, we needed a goat cheese that would not be overly  strong, but something light and delicate, a mild cheese that still could hold its own, yet, still had some zip and tang.  For us, it had to taste like a rich and creamy cheesecake.

Pink Peppercorn Goat Cheese Ice Cream by Modern Day Forager

Next, we added  pink peppercorns, which by the way, are not really peppercorns at all, they are dried pink berries from a rose shrub.  Who knew?  These lil pink pods are packed with spicy floral notes that add real depth to the ice cream, and a little bit of attitude and at the same time add some bite and chew.

To push it over the edge and make it MDF worthy, we went all out and added lil chunks of rich honey comb to really make this icy goodness stand out,  and with that, we just knew, we had to add the addition of  drizzled honey into the ice cream mix, for a sweet mouth feel and a sweet finish, and boy oh boy, this sweet freeze will surly keep you coming back for more.

Honey Comb by Modern Day Forager


 Ingredients:

  • 4 ounces good quality fresh goat cheese, crumbled
  • 2 tablespoons honey
  • 1 tablespoons pink peppercorns, coarsely ground (we use mortar and pestle)
  • 1 1/2 cups whole milk
  • 2/3 cup sugar
  • 6 large egg yolks
  • 1/4 cup honey comb, diced
  • 3 tablespoons honey drizzled in end product

Directions:

  1. Place goat cheese, honey and peppercorns in a large bowl and set aside.
  2. In a medium saucepan, warm the milk and sugar.
  3. In a medium bowl, whisk together the egg yolks.
  4. Slowly pour some of the warm milk mixture into the egg yolks, constantly whisking, to temper the eggs.
  5. Return the mixture to medium heat and continue whisking until the mixture thickens and coats your spatula well, pour it through a sieve onto the goat cheese, honey and peppercorns, stir until the cheese is melted and smooth.
  6. Stir until cool over an ice bath or chill the mixture thoroughly in the refrigerator.
  7. Freeze it according to your ice cream maker’s manufacturer’s directions.

Transfer to a freezer safe storage bowl, stir in honey comb pieces, and drizzle honey and combine, then cover and freeze for at least 2 hours.

Pink Peppercorn Goat Cheese Ice Cream by Modern Day Forager

Modern Day Forager

Figgy Ice Cream

Figgy Ice Cream

Recipes by Rj of Urban Table
Photo Styling & Art Direction by Traci of Urban Table
Photography & Art Direction by Heather of Heather Gill Photography
Figgy Ice Cream by Modern Day Forager

One of the reasons we took on ice cream this week is that we have been noticing a trend in the ice cream world, that ice cream never seems to taste enough like what it claims to be, or fully embraces the characteristics of the ingredients being used.  We wanted to see if we could change that and focus on showcasing and highlighting the ingredients from beginning to end.

Figgy Ice Cream by Modern Day Forager

So here is the scoop with our recipe, we have packed it full of fig flavor from fresh figs and figgy pudding bitters in the ice cream base and then finishing it off by garnishing the freshly churned ice cream with even more fresh figs, taking advantage of their wonderful texture, that combines the chewiness of their flesh, the smoothness of their skin, and the crunchiness of their seeds.  We think this says summer loud and clear.

Ingredients:

  • 20 + 2 fresh organic black mission figs, diced
  • 1 cup whole milk
  • 2 tablespoons fig bitters (we love AZ Bitters Lab Figgy Pudding Bitters)
  • 3/4 cup sugar

Directions:

  1. Place 20 diced figs in a medium saucepan with milk, cover and cook over medium heat, until tender, about 8 minutes.
  2. Add the sugar, and continue to cook, stirring frequently, until the figs are jam like, another 10 minutes.
  3. Purée the mixture with bitters in a food processor until smooth.
  4. Stir until cool over an ice bath or chill thoroughly in the refrigerator.
  5. Freeze it in your ice cream maker according to the manufacturer’s instructions.
  6. Sprinkle with diced figs and serve.

Figgy Ice Cream by Modern Day Forager

Modern Day Forager

Pink Peppercorn and Goat Cheese Ice Cream

Pink Peppercorn and Goat Cheese Ice Cream

Recipes by Rj of Urban Table
Photo Styling & Art Direction by Traci of Urban Table
Photography & Art Direction by Heather of Heather Gill Photography
Pink Peppercorn Goat Cheese Ice Cream by Modern Day Forager

A sweet  indulgence!  Goat cheese and pink peppercorns are the perfect match for our MDF wheelhouse.  They fit the criteria of being out of the box, something we would want to make over and over again and something we would want to serve and share with everyone.

When thinking about this recipe we had a lot to consider, first, we needed a goat cheese that would not be overly  strong, but something light and delicate, a mild cheese that still could hold its own, yet, still had some zip and tang.  For us, it had to taste like a rich and creamy cheesecake.

Pink Peppercorn Goat Cheese Ice Cream by Modern Day Forager

Next, we added  pink peppercorns, which by the way, are not really peppercorns at all, they are dried pink berries from a rose shrub.  Who knew?  These lil pink pods are packed with spicy floral notes that add real depth to the ice cream, and a little bit of attitude and at the same time add some bite and chew.

To push it over the edge and make it MDF worthy, we went all out and added lil chunks of rich honey comb to really make this icy goodness stand out,  and with that, we just knew, we had to add the addition of  drizzled honey into the ice cream mix, for a sweet mouth feel and a sweet finish, and boy oh boy, this sweet freeze will surly keep you coming back for more.

Honey Comb by Modern Day Forager

 Ingredients:

  • 4 ounces good quality fresh goat cheese, crumbled
  • 2 tablespoons honey
  • 1 tablespoons pink peppercorns, coarsely ground (we use mortar and pestle)
  • 1 1/2 cups whole milk
  • 2/3 cup sugar
  • 6 large egg yolks
  • 1/4 cup honey comb, diced
  •  3 tablespoons honey (local if possible)

Directions:

  1. Place goat cheese, honey and peppercorns in a large bowl and set aside.
  2. In a medium saucepan, warm the milk and sugar.
  3. In a medium bowl, whisk together the egg yolks.
  4. Slowly pour some of the warm milk mixture into the egg yolks, constantly whisking, to temper the eggs.
  5. Return the mixture to medium heat and continue whisking until the mixture thickens and coats your spatula well, pour it through a sieve onto the goat cheese, honey and peppercorns, stir until the cheese is melted and smooth.
  6. Stir until cool over an ice bath or chill the mixture thoroughly in the refrigerator.
  7. Freeze it according to your ice cream maker’s manufacturer’s directions.

Transfer to a freezer safe storage bowl, stir in honey comb pieces, and drizzle honey and combine, then cover and freeze for at least 2 hours.

Pink Peppercorn Goat Cheese Ice Cream by Modern Day Forager

Modern Day Forager

MDF’s Banh Mi Sandwich

Banh Mi Sandwich

Bahn Mi Sandwich by Modern Day Forager

Recipes by Rj of Urban Table
Photo Styling & Art Direction by Traci of Urban Table
Photography & Art Direction by Heather of Heather Gill Photography

Banh mi is humble, but it packs a real flavor punch and with all the traveling we do, we have found one thing is for sure, no two versions are the same.

Here is ours, we started with a golden crusty baguette with the right amount of chew, we hollowed out the interior of the bread just a bit, so we could add creamy Sriracha mayo, next we add the marinated pork (overnight) flavored with lemongrass and blended spices so the meat would be juicy, tender and succulent, then added it to the bread so that the bread could “sop up the juices”, packed it with a crunchy cucumbers, our twist with the addition of crispy Granny Smith apples, pickled carrot, daikon and added watermelon rind for our take on the traditional pickled veg and put it all together for a real show stopper.

Bahn Mi Sandwich by Modern Day Forager

Ingredients:

French baguette or French style hoagie roll (Traditional Banh Mi uses a Vietnamese style french baguette; usually made with a combination of rice and/or wheat flour, resulting in a very light, crackly crust and not overly dense bread.  We like just nice French baguette, don’t use sourdough.

Sriracha Mayonnaise (3 Tablespoons good mayo, 1 Tablespoon Sriracha, squeeze of lime)

Maggi sauce

Lemongrass pork shoulder (recipe below)

English cucumber, sliced very thin

Granny Smith apple, matchsticks

Cilantro, chopped

Jalapeno, sliced thin

Pickled Daikon, watermelon rind and carrot (recipe below)

Directions:

Slice the baguette into 6 inch pieces and then slice in half.

1. Slice the bread lengthwise, and then use your fingers to make a trough in both halves.

2. Generously spreading the inside with mayonnaise.

3. Drizzle in some Maggi Sauce.

4. Place pork steak on bottom of bread

5.  layer remaining ingredients on top of pork.

6.   Enjoy!

Lemongrass Pork Shoulder

Ingredients:

1 pound boneless pork shoulder steak, about 1/2 inch thick cut into 3 inch pieces

Marinade:

2 tablespoons light brown sugar

1 tablespoon chopped garlic

1 tablespoon chopped shallot

1 stalk lemongrass, trimmed and finely chopped

1/4 teaspoon black pepper

1 1/2 teaspoon black soy sauce

1 1/2 tablespoon fish sauce

1 tablespoon oil

Directions:

In a food processor, process the sugar, garlic, shallot and lemongrass.

Add the pepper, soy sauce, fish sauce, and oil and process to combine well.

Transfer to a zip lock bag add the pork, and turn to coat well.  Refrigerate up to 24 hours.

Let meat come to room temperature before grilling.

Preheat a grill to medium-high.

Grill for 6 to 8 minutes, until cooked through.

Let rest 10 minutes before slicing and serving.

Pickled Daikon, watermelon rind and carrot 

Ingredients:

1 large carrot, peeled and cut into thick matchsticks

1 pound of daikons (2), (we used green and sakurajima daikons) peeled and cut into thick matchsticks

1 cup watermelon rind, peeled and cut into matchsticks

1 teaspoon salt

2 teaspoons plus 1/2 cup sugar

1/4 cups distilled white vinegar

1 cup lukewarm water

Directions:

Place the carrot, watermelon rind and daikons in a bowl and sprinkle with the salt and 2 teaspoons of the sugar.  With your hands, knead the vegetables for about 3 minutes, daikons should bend but not break.  Drain in a colander and rinse under cold running water, squeeze out all excess water.  Place veggies in a pickling jar. (we used Weck jars)

In a medium sized mixing bowl, combine the 1/2 cup sugar, vinegar, and water.  Stir to dissolve the sugar.  Pour over the vegetables, making sure the brine covers the vegetables.  Let the vegetables marinate in the brine for at least 1 hour before eating. 

Bahn Mi Sandwich by Modern Day Forager

Modern Day Forager