A whole new kind of club…stacked!

Triple Decker Roast Beef with Horseradish Kewpie Mayonnaise by Modern Day Forager

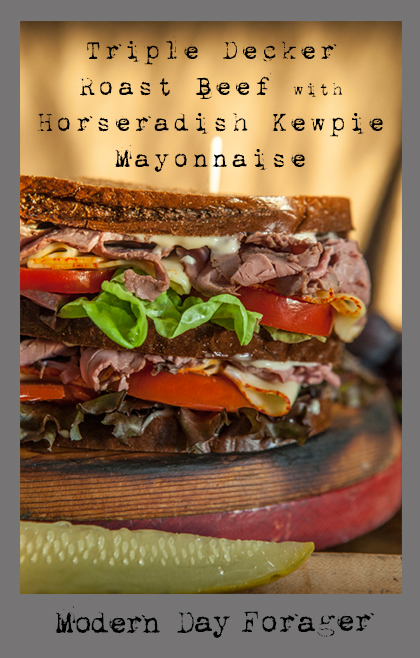
An all-time diner favorite, this mile-high club is our last sandwich this week, with a HG twist.  This triple decker tower of ingredients layered with artisan bread is truly a showstopper.

Reclaim dinner this week, with this rich and satisfying robust sandwich.  Who says you can’t serve sandwiches for dinner?  Don’t just think of sandwiches for livening up lunch.  With school in full swing, and everyone’s hectic schedules this fall, we decided to make Heather’s go-to  weeknight staple, her take of the roast beef club.

Triple Decker Roast Beef with Horseradish Kewpie Mayonnaise by Modern Day Forager

The clubhouse or also known as the Dagwood is on the rise, here at MDF.  Heather built this decadent meaty sandwich with style, care and flair.

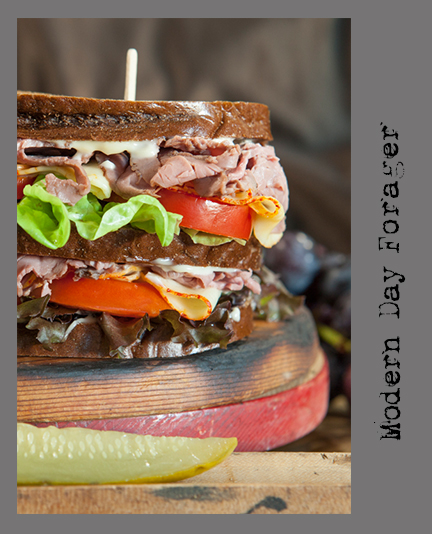
First and foremost, you should know that Heather goes to great lengths to curate high-end carefully sourced ingredients, so with that in mind, she started with rich toasted dark rye and it grew from there, slathering our version of Kewpie mayo with the addition of fresh grated horseradish and chopped woodsy rosemary.  Then added fresh crisp greens, juicy ripe plum tomatoes, smooth but slightly tangy Muenster (cow’s milk cheese with a thick orange rind) and mounds of slow roasted, thinly sliced, rosy pink roast beef.

Highly anticipated for this combination of flavors and textures, this beauty was a huge hit in our test kitchen as Heather crafted her three-story stack of goodness for our photo shoot.  At the end of the day, the result was a hearty dinner which was ready in no time, and boy was that a good thing, because boy were we hungry.

Triple Decker Roast Beef Club with Horseradish Kewpie Mayonnaise

Ingredients:

Makes 2 large sandwiches

  • 1/2 pound roast beef
  • 1/2 pound Munster cheese – sliced very thin
  • Horseradish Kewpie Mayonnaise (recipe below)
  • Leaf Lettuce
  • Roma Tomatoes – sliced thin
  • 6 slices or Dark or Marble Rye Bread
  • Tooth picks – you will need them!

Directions:

  1. Toast the bread and spread horseradish Kewpie mayonnaise on 3 sides.
  2. Build the sandwiches–first with a layer of lettuce, then tomato, then cheese, then roast beef.
  3. Top with another layer of bread and add to that lettuce, then tomato, then cheese, then roast beef and the last piece of bread.
  4. Add toothpicks to help hold together.  Find someone to share this with, it’s a big sandwich!

Kewpie Horseradish Mayo

Ingredients:

  • 1/3 cup MDF Kewpie mayonnaise
  • 2 tablespoons prepared white horseradish
  • 1 teaspoon chopped fresh rosemary
  • Salt and freshly ground pepper

Directions:

  1. Whisk Kewpie mayo, horseradish and rosemary in small bowl and season with salt and pepper.
Recipes by Rj of Urban Table
Photo Styling & Art Direction by Traci of Urban Table
Photography & Art Direction by Heather of Heather Gill Photography
Modern Day Forager

Modern meets Old Fashioned…

Old Fashioned Pastrami Sandwich from Modern Day Forager

Modern’s Old Fashioned Pastrami on Rye

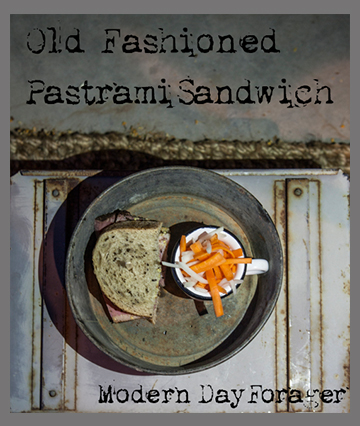
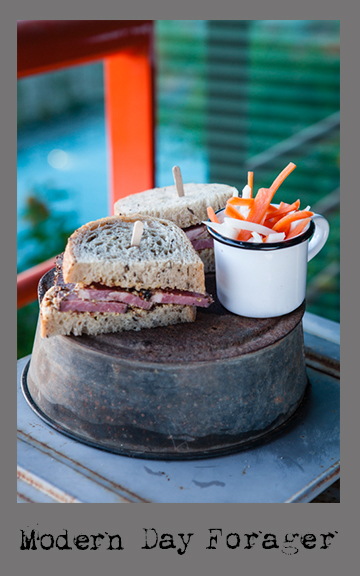
Paying tribute to an old fashioned deli masterpiece.  One of the simplest, most familiar, sandwiches is pastrami on rye, and for many, it is the king of all sandwiches.

Foolproof, this  rich silky, garlicky, peppery and piled sky-high pastrami needs no bells or whistles.  The magic happens, when crafting the meat– curing, spicing, crusting, smoking and steaming.  Then, all that is needed is soft chewy seeded rye, one that has some sourness to it, along with a dusting of cornmeal on the bread’s surface.  The bread must be warm (a must) and is the perfect vehicle to add a heaping helping of Modern’s Stout Mustard, which never disappoints.  So curate high-quality meat or make your own.  This iconic sandwich is as straight-forward as it gets, but provides a taste that you remember and want over and over, keeping  you coming back for more.

I could not blog about pastrami without mentioning my favorite place in the world to have this sandwich, and it is not even in NYC.  For me, Langer’s in LA, downtown LA no less, is  truly the very best.  It is a pastrami mecca, and the pastrami sandwich is taken very seriously at this landmark restaurant.  So, if you are ever in Los Angles, this is a must-have sandwich.

Langer’s Deli

704 S. Alvarado Street

Los Angles ,90057

+ 213.483.8050  langersdeli.com

Old Fashioned Pastrami with Stout Mustard by Modern Day Forager

Modern’s Old Fashion Pastrami on Rye

Ingredients:
  • 12 ounces thick cut pastrami  (Purchased from your local deli or make your own, recipes below)
  • 4 slices of rye bread
  • 2 tablespoons MDF Stout Mustard
  1. Place pastrami in a skillet over medium high heat.  Cook until fat of pastrami starts to steam, cover with two slices of rye bread.  Steam bread to warm, remove bread, flip over pastrami.   Cover with remaining rye bread and steam.
  2. On your work surface, place 2 slices of steamed rye bread and spread each with 1 tablespoon MDF Stout Mustard.  Layer each bread slice with 6 oz. thick cut pastrami; place two remaining slices of bread on top of pastrami.
  3. Enjoy! 

Variations:

  • Layer pastrami, sautéed onions and Thousand Island dressing on rye bread.
  • Top with house made cole slaw
  • Swiss Cheese
  • Horseradish sauce
  • Slice Pastrami thin and pile high

Home-Cured Beef Pastrami by Michael Ruhlman on Ruhlman.com

Ingredients:

  • 6 ounces or 3/4 cups kosher salt
  • 3 ounces or ½ cup sugar
  • 2 teaspoons pink salt, optional
  • 5 cloves garlic, smashed with the flat side of a knife
  • 4 tablespoons pickling spice
  • 1 5-pound beef brisket, the more fat it has the better

Rub:

Ingredients:

  • 1 tablespoon peppercorn, toasted and ground (or as needed)
  • 1 tablespoon coriander seed, toasted and ground (or as needed)

Directions:

  1. In pot large enough to hold brisket, combine 1 gallon/4 liters of water with kosher salt, sugar, sodium nitrite (if using), garlic and 2 tablespoons pickling spice.  Bring to a simmer, stirring until salt and sugar are dissolved. Remove from heat and let cool to room temperature, then refrigerate until chilled.
  2. Place brisket in brine, weighted with a plate to keep it submerged; cover.  Refrigerate for 2 days if it’s thin, a third day if it’s thick.
  3. Remove brisket from brine and rinse thoroughly.  Refrigerate it for another day uncovered (this is best, to let cure equalize, but if you can’t wait, that’s ok too).
  4. Combine the pepper and coriander and coat the brisket with it.   Smoke and cook the brisket, till tender, as described above.  Slice thinly to serve.  This will keep for a week in the refrigerated.  Steam it to reheat or reheat covered in a microwave (gently).

Pickling Spice

Ingredients:

  • 2 tablespoons black peppercorns
  • 2 tablespoons mustard seeds
  • 2 tablespoons coriander seeds
  • 2 tablespoons hot red pepper flakes
  • 2 tablespoons allspice berries
  • 1 tablespoon ground mace
  • 2 small cinnamon sticks, crushed or broken into pieces
  • 2 to 4 bay leaves, crumbled
  • 2 tablespoons whole cloves
  • 1 tablespoon ground ginger

Directions:

  1. Combine peppercorns, mustard seeds and coriander seeds in a small dry pan.  Place over medium heat and stir until fragrant, being careful not to burn them; keep lid handy in case seeds pop.  Crack peppercorns and seeds in mortar and pestle or with the side of a knife on cutting board.
  2. Combine with other spices, mix.  Store in tightly sealed plastic or glass container.

Pastrami Recipe for use with Smoker and Cherry Wood

Ingredients:

  • 1/2 cup kosher salt
  • 1/2 cup brown sugar
  • 1/4 cup black peppercorns
  • 4 tablespoons coriander seeds
  • 5 cloves garlic, smashed
  • 2 bay leaves
  • 5 to 6 pound brisket flat, trimmed
  • 1 qt beef stock
  • 2 12 ounce bottles of beer
  • 3/4  gallon cold water
  • 4 tablespoons pickling spices
  • 4 bay leaves
  • 2 tablespoons additional juniper berries
  • 2 tablespoons additional black peppercorns

Directions:

  1. Place peppercorns and coriander seeds in a grinder and grind until coarsely chopped.  Mix the salt, sugar, garlic, and ginger with the seasonings from the grinder.
  2. Reserve 1/4 of the seasonings.  Rub the flat thoroughly on all sides with seasonings.  Wrap in plastic wrap, then aluminum foil.  Place in a glass pan in the refrigerator.  Turn daily for at least one week, up to two weeks is better. Remove brisket from all wrappings.  Place on rack in pan so it can drain, and put uncovered in refrigerator  overnight, until very dry.
  3.  Prepare smoker with cherry wood at lowest temperature while still producing smoke.   Place cold flat in the smoker. Smoke for 3 hours,
  4. Remove  from smoker and place in a large dutch oven.  Cover  with  beef stock, beer and water.  Add the reserved rub, the pickling spice, the bay leaves, the additional juniper berries, and the additional black peppercorns.
  5. Simmer covered until tender about 3 hours.
  6. Remove from pot and slice. (cut across grain)
Recipes by Rj of Urban Table
Photo Styling & Art Direction by Traci of Urban Table
Photography & Art Direction by Heather of Heather Gill Photography


Modern Day Forager

Build a better sandwich


There is so much more to making a sandwich than slapping all sorts of ingredients between two slices of bread.  This week, we will take the sandwich and elevate this portable package to new heights.  Is there an art and a formula to making a great sandwich?  We sure think so.

With attention to detail, carefully sourced ingredients, and a little extra time, you can make an unbeatable sandwich.  First, it all starts with the bread… should it be crusty, crispy or chewy?  The bread is the blank slate, the perfect landscape, think about your ingredients, are they right for your bread, you don’t want a soggy vessel.  Look for hearty, healthy, local artisanal bread with texture.  Next, choose high quality protein and fresh, local produce.   Add vegetables such as cucumbers for an extra crispness then try apples or pears for added sweetness and crunch.  Finally don’t forget to spread on the house made condiments, which are easy to make and you control what goes in your spreadable.  Great bread, great ingredients, well-thought out flavors, textures and combinations equal a great sandwich.

Argentinian Steak Sandwich

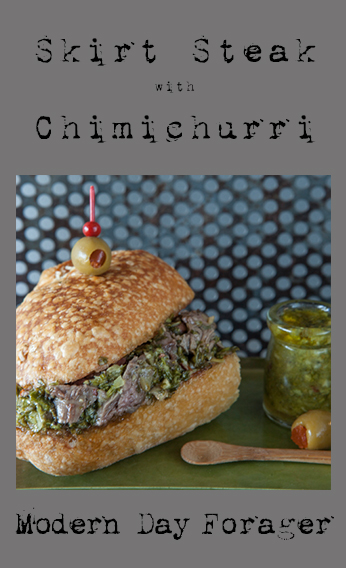
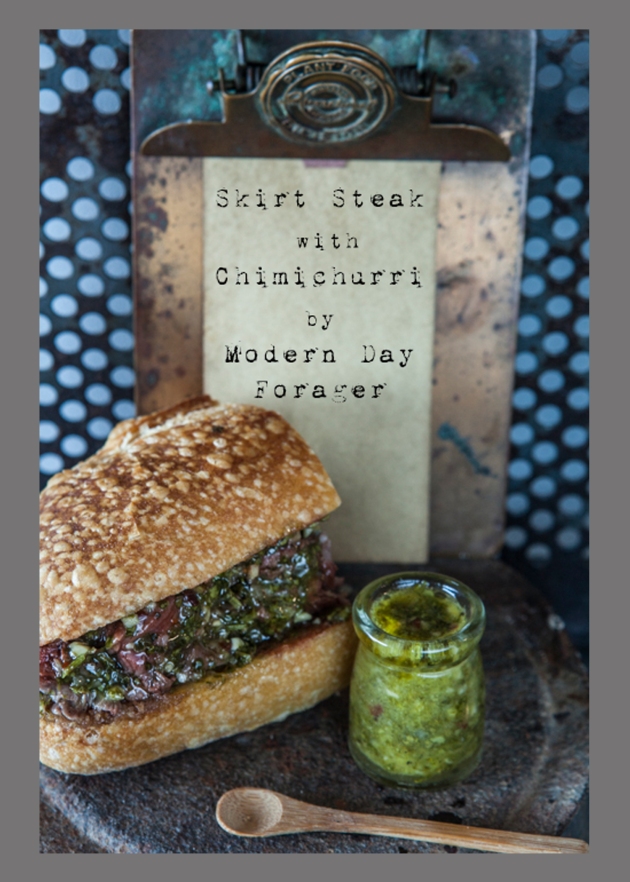
Skirt Steak with Chimichurri by Modern Day Forager


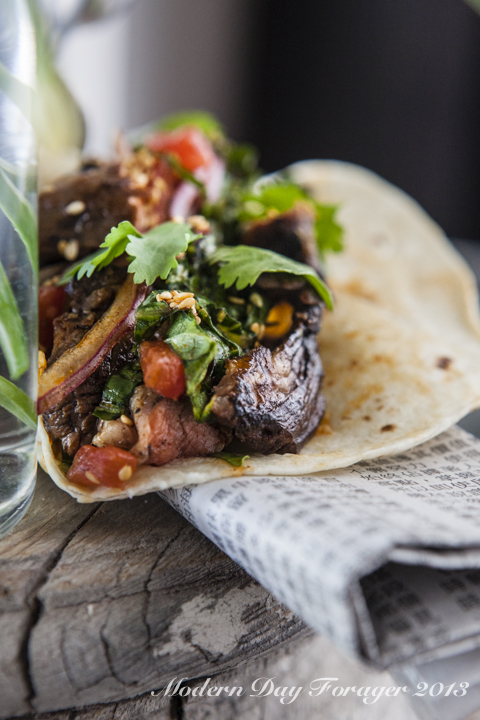
The steak sandwich has taken many forms over the years, in different parts of the country and all over the world.  It has also spawned many other tremendous sandwiches like the cheesesteak, the French dip, my personal favorite the Italian beef and so many more.  The basis for them all is a good piece of meat (or a well marinated and/or seasoned one) and great bread.  It only figures that a country like Argentina that loves its steak would also be home to one of the most flavor packed steak sandwiches in the world here is our take:

Ingredients:
• Skirt Steak
• Chimichurri–MDF Chimichurri Recipe
French bread loaf of roll

Directions:
1.  Rub skirt steak with Chimichuri and marinate for at least 2 hours. (we do ours overnight in a zip lock bag)
2.  Grill to desired doneness. (no more than med-rare)
3.  Slice on bias against the grain about 1/2 inch thick.
4.  Shingle on bread and top with more chimichurri.
5.  Serve with more chimichurri as a dip.

Variations:
• Add grilled red pepper
• Serve with mayo, lettuce and tomato
• Serve with sautéed onions

Skirt Steak with Chimichurri by Modern Day Forager

Note:
For a great side dish toss chimichurri sauce on potato wedges and roast in 400°F oven until just tender, about 40 minutes.

Grilled Salumi and Cheese with Mustarda

sandwich5


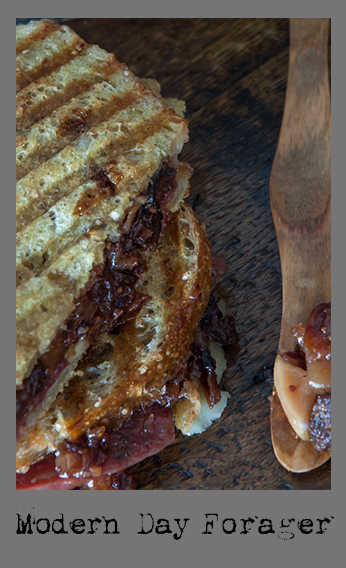
By all accounts the good ‘ol American style grilled cheese sandwich has been around since the 1920s and there are versions of this standard in just about every culture around the world.  We love a good grilled sandwich as much as anyone so this is our fusion of a grilled cheese, a Croque-monsieur and a Panini. The key, to the perfect grilled sandwich is that the flavors and textures all compliment each other and we think this one does just that…

sandwich6

Ingredients:

Directions:

  1. On one piece of bread, spread the mustarda in an even layer.
  2. Fan the salumi slices over mustarda.
  3. Lay the cheese on top of the salumi.
  4. Top with another slice of bread.
  5. Spread 1/2 teaspoon butter on the top slice of bread.

*Repeat this for the remaining three sandwiches.

  1. Heat a large non-stick skillet over medium high heat and add the remaining butter to the pan.  Once the butter is foaming, place the non-butter side of the sandwich in the pan. (we used our Panini maker)

Heat for 5-6 minutes until golden brown and the cheese begins to melt.  Using a spatula, flip the sandwich to the other side for another 3-4 minutes until golden brown and the cheese is completely melted.

Recipes by Rj of Urban Table
Photo Styling & Art Direction by Traci of Urban Table
Photography & Art Direction by Heather of Heather Gill Photography

Modern Day Forager

Modern’s take on Mustarda and Chimichurri

Spicy Mustarda by Modern Day Forager

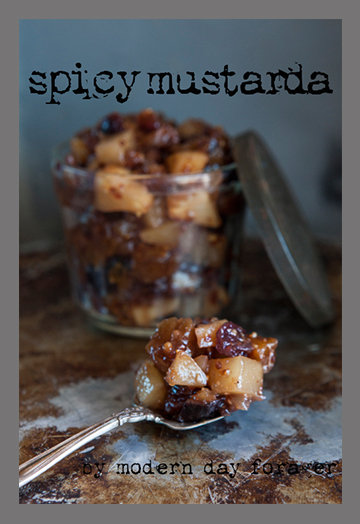
This cherished (Sicilian) Italian condiment has many faces, made with fruit, (fresh, dried or candied) sugary syrup, wine and the essence of mustard, it is quite versatile.  The specialty dish, Bollito Mistro in northern Italy, traditionally served mustarda along side this hearty stew (similar to the French Pot-au-feu) as a celebration dish in the fall and winter.  It has gained popularity and made its way as an accompaniment on charcuterie, crusty breads, cheese boards, spooned over creamy polenta and it is equally delicious, crowned on poultry, game and fish.  It even adds a depth of savory piquancy and sweet flavor as a quick pan sauce or poured over ice cream.  Our favorite way to enjoy mostarda is to add it to a grilled salami and gruyere cheese sandwich, the mostarda just adds a richness and a spicy-sugary balance to the saltiness of the cheese and salami.  Yum!

 Spicy Mostarda

Ingredients:

• 1/2 cup dried apricots
• 1/2 cup dried cranberries
• 1/2 cup dried figs
• 1/2 cup dried cherries
• 1 shallot, minced
• 1 1/2 teaspoons minced crystallized ginger
• 1 cup dry white wine
• 1/4 cup honey
• 2  firm Bartlett pears, cubed
• 2 tablespoons of yellow mustard seeds
• 1 tablespoon mustard powder
• 1 teaspoon red pepper flakes
• Coarse salt and freshly ground pepper

Directions:

1.  Place the dried fruits, shallot, ginger, wine and honey in a medium saucepan and simmer for 10 minutes.
2.  Add pears, mustard seed and mustard powder and continue simmering for another 10 minutes.  (pears should soften but still hold shape)
3.  Season with red pepper flake, salt and freshly ground black pepper.
4.  We like our mustarda chunky here at MDF but if you prefer a thinner consistency you can puree part half the mixture and then mix for a medium chunk or puree the entire batch for a jam like consistency.
5.  Let the mustarda cool, place in a sealed container and store in the refrigerator.

Chimichurri Sauce by Modern Day Forager

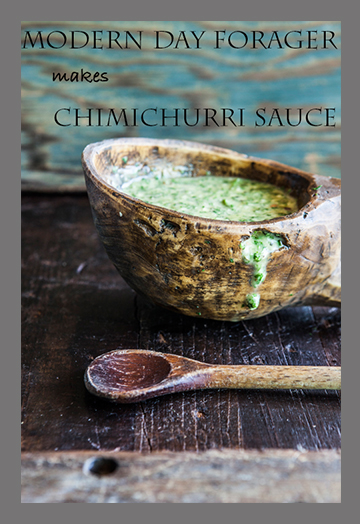
This acclaimed quintessential Argentinean sauce, chimichurri compliments grilled meats perfectly and is a crowd pleaser you should try for your next summertime gathering.  This fairly spicy sauce is bright, fresh and herbaceous with a garlicky, tangy punch.  Made of parsley, oregano,  garlic, shallots, vinegar, fresh lemon juice, red pepper flakes, and olive oil, this sauce really needs time to meld all of the flavors together, so make a day or two ahead of time, before you serve it.  Not only can you present this table side but if you don’t have the extra time to make it ahead, it also makes a easy and quick (that day) marinade for vegetable kabobs, beef, lamb, poultry,  fish and will really pop and heighten the flavor.

 Argentinian Chimichurri Sauce

Ingredients:

• 1 cup chopped Italian parsley
• 5 cloves garlic, chopped
• 1 teaspoon salt
• 1/2 teaspoon freshly ground pepper
• 1/2 teaspoon red pepper flakes
• 2 tablespoons fresh oregano leaves
• 1 shallot
• 3/4 cup olive oil
• 3 tablespoons sherry vinegar
• 3 tablespoons lemon juice

Directions:

1.  Place all chimichurri sauce ingredients in a blender or food processor and pulse until well chopped, but not pureed.
2.   Store in an airtight container in the refrigerator.

Plus it makes an incredible cheeseburger topping.  Try adding it to soups, stews and rice dishes, as well.

Recipes by Rj of Urban Table
Photo Styling & Art Direction by Traci of Urban Table
Photography & Art Direction by Heather of Heather Gill Photography

MODERN DAY FORAGER

A week of Modern’s favorite condiments

Well hello there…

We are back from our much needed break and we are raring to go and just over the moon to get back to our beloved blog.

This week it is all about MDF’S favorite condiments and ramping up the flavor.

Today, people have become much more sophisticated with their food choices, then in the past.  We are willing to experiment, taste new flavors and learn about new cultures.  Usually, it starts with condiments that have gone mainstream.

So, we want to DIY our condiments.  Why?  Well, most of the so-called jars of goodness, we buy, are filled with all sorts of  preservatives, chemicals, fillers, binders and high fructose corn syrup.   Making a small batch from scratch is a much healthier and tastier way to go.

KEWPIE MAYO
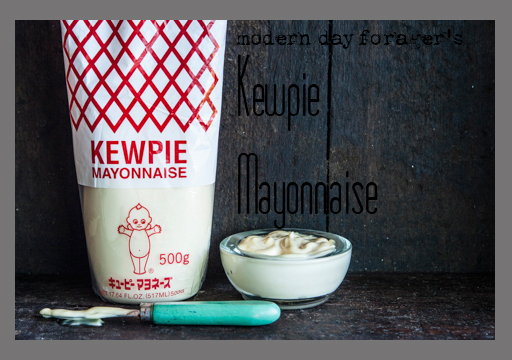
Kewpie Mayonnaise by Modern Day Forager


First up, is our take on Kewpie Mayonnaise, the name alone makes for a great conversation.  This Japanese mayo with the kewpie baby doll on the bottle is quite popular among big time foodies, this  is our version without the addition of crystallized monosodium glutamate.

What is interesting about this mayo that differs from homemade and industrial mayo, made here in the states, is that, only egg yolks are used and mainly rice wine vinegar or some other type of vinegar is used to replace the lemon juice.   The end result is a yellowy, creamy, rich, thick, eggy mayo with a  smooth luxurious mouth feel that is quite satisfying.  You have never tasted a mayo like this, and once you do, you’ll wonder how you ever got by without it.

Flavor-packed, this condiment is wonderful on deviled eggs, burgers, sandwiches, dressings, dips, spreads, in egg, chicken and tuna salads and amps up just about everything you put it on or in.  It is also used as a umami flavor in many restaurants across the country and  is a secret ingredient among many chefs.

Modern’s take on Kewpie Mayo

Ingredients:

  • 2 Egg yolks
  • 1 tablespoon rice wine vinegar
  • 1 teaspoon hot Japanese mustard
  • 1/2 teaspoon dashi powder
  • 1 teaspoon Salt
  • 1/4 teaspoon Sugar
  • 1 1/2 cup canola oil

Directions:

1. Place the egg yolks in the bowl of the food processor, add the vinegar and mustard, season with dashi powder, salt and sugar to taste.  Turn the machine on and VERY slowly start to drizzle in the oil until the mixture starts to look like mayonnaise, then a slow steady stream of oil can be added.

2.  Put in the refrigerator for at least an hour to let the flavor develop.

Note:  If the mayonnaise is too thick add a few drops of water or if it is not thick enough, with the machine running, add a little more oil.

Recipe Ideas:

Broiled Mussels with Dynamite Sauce:

(Dynamite sauce also is a great sushi dipping sauce)

24 mussels, steamed
, 1/2 cup Kewpie mayonnaise, 
1 tablespoon Sriracha, 
1 small garlic clove (smashed to a paste), 1 teaspoon sugar.

Preheat broiler on high heat. Remove one half of mussel shell and discard.  Whisk together mayonnaise, Sriracha, garlic, and sugar, then place about 1 teaspoon over each mussel.  Place mussels on a foil-lined baking sheet.  Broil 4 to 5 inches from heat until sauce is bubbling and begins to brown, 6 to 8 minutes.

Ian Knauer is the author of The Farm: Rustic Recipes for a Year of Incredible Food

 Devil Egg: 

Mix yolks with kewpie mayo, minced habanero and freshly ground black pepper.

Dip:

2 tablespoons kewpie mayo and a squeeze of wasabi paste to taste, mix.

KIMCHI RELISH
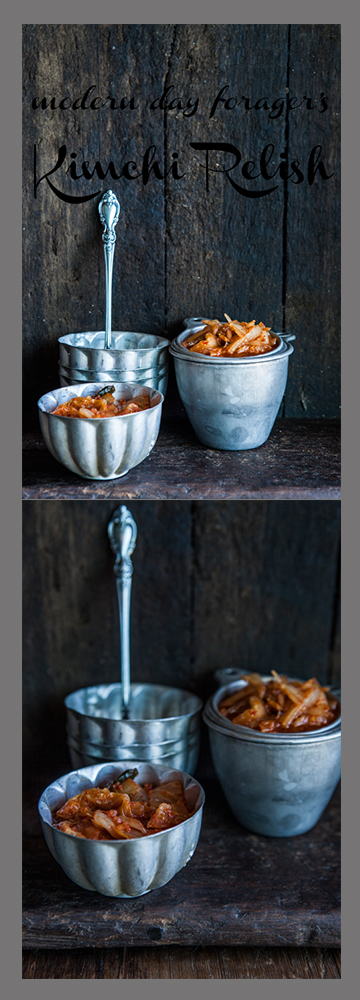
Kimchi Relish by Modern Day Forager


Hints of old fashioned sensibilities but couldn’t be more modern, is our take on kimchi.  Kimchi or sometimes called gimchi is a traditional side dish or topping made of spicy fermented vegetables.  Kimchi is a staple in Korean households and comes in many types and varieties, but the most common are made with cabbage, cucumbers, radish and green onions.  We decided to get our kimchi fix on by making kimchi relish which is chopped finer then traditional chunky kimchi.  We added agave nectar, rice wine vinegar and Sriracha, which gave a slight sweetness and a spicy kick at the same time and just tastes darn good.

This crispy relish works well on burgers , hotdogs, tacos, sandwiches, in soups or stews and on steamed rice or noodles.  It will  stand up beautifully to any steak or add a real punch to a bland chicken dish.  If sunny California is in your near future or on your bucket list, try Kogi BBQ, the famous LA Korean taco food truck.  They do a kimchi quesadilla that will  just knock your socks off.

We love David Chang’s recipe, so we went with his kimchi.

Modern’s take on Kimchi Relish

 Ingredients:

  • 1/2 cup kimchee, thinly sliced (recipe below)
  • 2 teaspoons agave nectar
  • 2 teaspoons rice vinegar
  • 1 teaspoon Sriracha
  • Salt and pepper to taste

 Directions:

  1. Combine kimichi, agave, vinegar and Sriracha in a medium bowl, season with salt and pepper to taste and serve.

 MOMOFUKU KIMCHI

Ingredients:

  • 1 small to medium head Napa cabbage, discolored or loose outer leaves discarded
  • 2 tablespoons kosher or coarse sea salt
  • 1/2 cup plus 2 tablespoons sugar
  • 20 garlic cloves, minced
  • 20 slices peeled fresh ginger, minced
  • 1/2 cup Kochukaru (Korean chile powder)
  • 1/4 cup fish sauce
  • 1/4 cup Usukuchi (light soy sauce)
  • 2 teaspoons jarred salted shrimp
  • 1/2 cup 1-inch pieces scallions (greens and whites)
  • 1/2 cup julienned carrots

 Directions:

  1. Cut the cabbage lengthwise in half, then cut the halves crosswise into 1-inch-wide pieces.
  2. Toss the cabbage with the salt and 2 tablespoons of the sugar in a bowl.  Let sit overnight in the refrigerator.
  3. Combine the garlic, ginger, chile powder, fish sauce, soy sauce, shrimp, and remaining ½ cup sugar in a large bowl.  If it is very thick, add water 1/3 cup at a time until the brine is just thicker than a creamy salad dressing but no longer a sludge.
  4. Stir in the scallions and carrots.
  5. Drain the cabbage and add it to the brine.
  6. Cover and refrigerate.

Though the kimchi will be tasty after 24 hours, it will be better in a week and at its prime in 2 weeks.  It will still be good for another couple weeks after that, though it will grow stronger, and a little more sour and funkier.

 Serving Size:

Makes 1 to 1½ quarts

Innovative recipe of David Chang author of “Momofuku: The Cookbook.”

Recipes by Rj of Urban Table
Photo Styling & Art Direction by Traci of Urban Table
Photography & Art Direction by Heather of Heather Gill Photography

Modern Day Forager

Asian Short Rib Tacos

Asian Tacos by Modern Day ForagerAsian Short Rib Tacos

Bring your curbside cuisine inside to create your own table top taqueria.  This recipe is the real deal, starting with a range of flavors, a smoky sweetness with a spicy kick, sesame seeds blended to bring out the nuttiness, brightness from all of the citrus, a punch of flavor with the addition of ginger and if that wasn’t enough a crispiness from the shredded romaine lettuce, red onion and juicy tomatoes, crowned with jalapeños and cilantro, all served in soft warm grilled flour tortillas.  Embrace the taco trend and jump on the ubiquitous band wagon or should I say ubiquitous food truck.  Enjoy!

Asian Tacos by Modern Day Forager
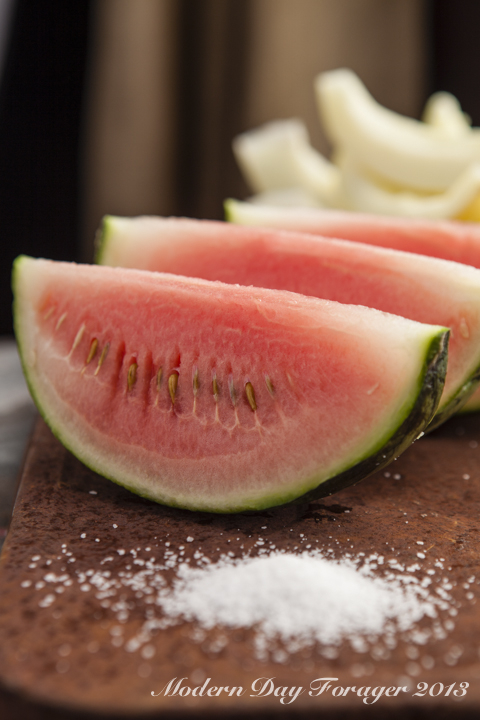
Ingredients:

3 pounds beef short ribs

1/2 Romaine lettuce, shredded

1/2 red onion, sliced thin

2 Roma tomatoes, diced

1 jalapeño, sliced thin

flour  tortilla

Cilantro leaves to taste

2 limes, wedged

Marinade:

1 cup white onion
, diced

1 cup black soy sauce

1/4 cup sugar

1 cup club soda

1/2 cup orange juice

1 tablespoon freshly ginger, minced

1/4 cup sesame oil

3 cloves garlic, minced

Place all marinade ingredients and short ribs to a large zip lock bag marinade the beef short ribs overnight in refrigerator.

Sauce:

3 tablespoons sesame chili oil

1/2 cup fresh squeezed lime juice

zest from 1 lime

1/4 cups soy sauce

1 1/2 tablespoons chili powder

3 tablespoons  sesame seeds

1 teaspoon sugar

Salt to taste

Add all sauce ingredients to a medium sized mixing bowl and mix well. Refrigerate until use.

Directions:

  1. Grill the short ribs, about 5 minutes each side
  2. Grill tortillas
  3. Cut meat of bones
  4. Place meat on the tortilla add  lettuce, red onion,jalapeño, tomato and cilantro
  5. Drizzle with sauce
  6. Squeeze of lime

Asian Tacos by Modern Day Forager

Recipes by Rj of Urban Table
Photo Style & Art Direction by Traci of Urban Table

Photography & Art Direction by Heather of Heather Gill Photography

Modern Day Forager

Simply Sensational Melon Sangria

 Simply Sensational Melon Sangria

Melon Sangria by Modern Day Forager

Savour the evenings or the summer sunshine while mastering the art of making this flavor-packed sangria.  This recipe is simple and will ramp up any outdoor fare, plus we’re sure you’ll be the talk of the town or your next bbq bash.

Ingredients:

2 cups mixed melons cubed (we used cantaloupe, honeydew, watermelon, and Juan Canary)

4 ounces of brandy (if you wont drink it don’t cook with it)

1 granny smith apple sliced

1 bottle of Riesling (cold)

3-4 drops ginger extract

pineapple and white cranberry juice to taste (Ocean Spray makes a white cranberry and peach that works great)

Directions:

Place melon in an airtight container or zip lock bag, add brandy and refrigerate for 2 to 12 hours.

In a large serving container or pitcher stir melon, apples, wine, extract and juices together

Add ice to glasses pour in sangria and spoon extra fruit on top as garnish.

(Sangria gets better with time in the refrigerator )

Melon Sangria by Modern Day Forager
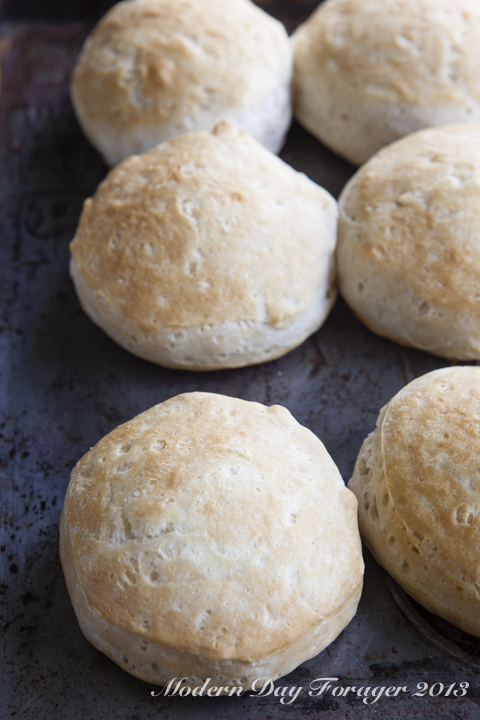
Variations

Sparkly: Club soda or ginger ale

Fruity: grapes, oranges or peaches

Savory: Basil, cardamom or saffron

Boozy: Midori, fruit schnapps, more brandy

Sugary: Moscato, 1/3 cup sugar, simple syrup

Have fun with this and please share your spin on this recipe with use here in the comments or on our Facebook page.

Melon Sangria by Modern Day Forager
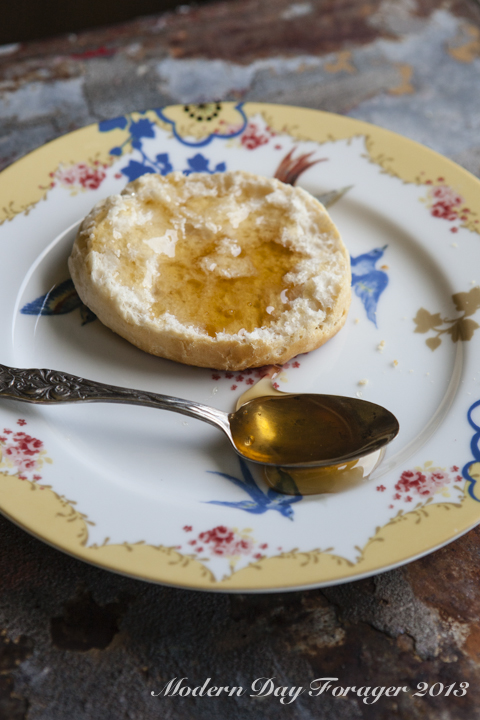
 

Recipes by Rj of Urban Table
Photo Style & Art Direction by Traci of Urban Table

Photography & Art Direction by Heather of Heather Gill Photography

Modern Day Forager

Selecting, Storing and Preparing

Melon Week on Modern Day Forager

Every Saturday during melon season, I was asked the same question over and over;  “Could you select a melon for me?”  “How can I tell if a melon is ripe?”  “How do I store this at home?”  So let me try to arm you with the information you need.  First of all, one of the great things about shopping at your local farmers market is that most, not all, of the farmer’s at the market grew what they are selling, that being said, the melon was picked ripe, there are degrees of ripeness to be sure, but the melon is certainly eatable.  The problem comes in when the farmer or a grocery store purchases melons that have to be trucked to their final destination.

Melon Week on Modern Day Forager

 Selecting Melons:

Cantaloupe – Good quality cantaloupes will have a lot of  webbing on the skin, it will have a yellow/orange color and be slightly soft on the stem end.  If the cantaloupe is not ripe enough to your liking, store at room temperature on your kitchen counter or in a loosely closed paper bag for one to two days.

Honeydew – High-quality honeydew melons should be a creamy color and the skin will almost feel waxy when ripe.  They will be somewhat firm with a bit of softness at the stem.

Watermelon – Great tasting watermelons will be firm, even-shaped and heavy for its size.  The easiest method to judge ripeness is to look at the spot where it laid on the ground, that should be a darker yellow, and the rind overall should have a healthy sheen.  Watermelons do not ripen any further once they are cut from the vine.  Most popular watermelons are round dark green or dark green striped.  The light green oval shaped are usually not as sweet and red on the inside.

Seedless Watermelon– Like seeded watermelons, seedless watermelons will be firm, evenly shaped and heavy for their size.  Remember seedless watermelons are not seedless, instead of the large black seeds; they have the small white seeds that some people consider edible.  (I do not)

Storing Your Melons:

Uncut melons can be kept at room temperature for two to four days.  Ripe melons can be refrigerated for an additional 5 days.  Cut melons should be placed in a covered container and refrigerated for no more than three to four days.

Preparing Melon:

Melons taste wonderful just as they are.  Although, we are going to play around with them this week (that’s what we do.)  We like cantaloupe sprinkled with salt and a little black pepper, the combination is amazing, wrap them in prosciutto or any cured meats, blend the flesh and add the juice to anything, perfect addition to any fruit salad. Watermelon is wonderful with salt as well, we also like honey and lime or balsamic vinegar.  Let us know your favorite way to enjoy melons and we will pass them on to our readers.

Melon Week on Modern Day Forager
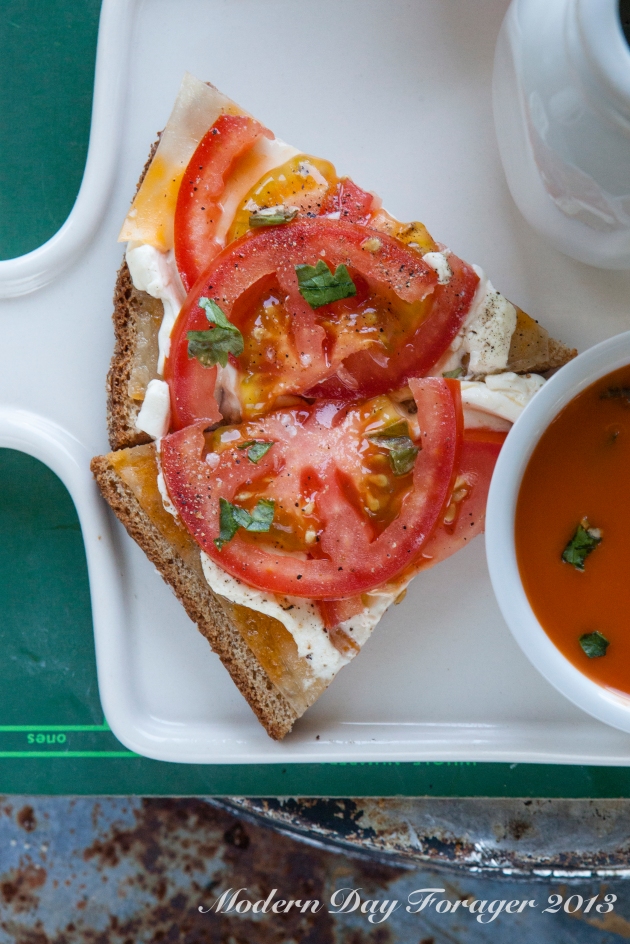
I hope that I was able to shed some light on the picking a melon question, please comment here or on facebook if you have any other questions on choosing a melon or any other farm fresh fair for that matter.

Melon Week on Modern Day Forager

Modern Day Forager

Grandma Week Wrap-up

Grandma Week Wrap-up

Grandma-isms by Modern Day Forager

It is with both trepidation and sorrow that we bid Grandmothers’ week ado!  We have had such a wonderful time just jabbering about our grandparents (hmmm… could a Grandfathers week be in the making?) and sharing just a fraction of those memories with each other and in turn our followers/you.

We started our week with a brief history of our grandmas’ and the incredible influences they had on us as people and as chefs, then we asked for your input and stories, thank you again, to those of you that shared with us.  Your stories just re-emphasized our belief that these women shaped our future, one generation at a time, from what we think to what we eat, from what we say to how we say it and the whole time with humor and love sprinkled in for good measure.

Next we dove into summer (and head first into Heather’s grandma’s freezer) with a tasty, super simple and incredibly versatile freezer jam that just may become one of the things your grandchildren look fondly back on, that you made for them every summer.

Simple Freezer Jam by Modern Day Forager

Every meal that came to my grandmother’s table included bread and butter, you may ask, “what does that have to do with the price of tea in China” let me tell you… no bread brought more smiles than fresh from the oven biscuits and oh by the way, what goes great with all that freezer jam?  That’s right…biscuits!

Grandma's Biscuits by Modern Day Forager

Grandma's Biscuits by Modern Day Forager

It didn’t take us long as we tested our biscuit recipe to decide the next recipe had to be strawberry shortcake. The biscuits make a wonderful vehicle for the sweet summer berries and will hold up to copious amounts of whipped cream and syrup.  Start with grandma’s basic and put your own spin on it.  Balsamic whipped cream, balsamic and black pepper syrup add fresh basil to any or all the ingredients, let your imagination run wild and take our tradition and create yourself a new one.

Strawberry Shortcake by Modern Day Forager

The next stop was back in my Grandma’s kitchen.  Breakfast was always a treat whether it was pancakes, waffles, eggs any number of ways (my favorite, and to this day unduplicated, a Swedish egg dish called rara) occasionally (if it didn’t break the bank) my favorite dry cereal or on the best of days… home made donuts.  Grandma would carefully make the dough, then cut them out on a giant cutting board, then fry 3 or 4 at a time in a big cast iron pot, finally setting them cattywampus on an old brown paper bag to drain … I would be in charge of bringing the warm donuts to the breakfast nook where my grandfather and I would devour them before the next batch was done frying.  I would alternate between powdered sugar, cinnamon sugar and just plain granulated sugar, the whole kit and caboodle, while my grandfather took his plain to dunk in his coffee from the percolator…how could a morning get any better?  I don’t want to sound like a broken record  (do you sense a secondary theme here) but what a great opportunity for you to put your own twist on these magic pieces of fried dough and create a tradition.

Grandma's Donuts by Modern Day Forager

We hope that everyone understands our grandmothers’ where not disciples of Julia Child, they were not gourmands’, four of these women (not Heather’s she is the spring chicken of the MDF family) lived and fed families through The Great Depression (when hand-made, home-made, recycled, re-used, and re-purposed were a way of life not a trend to be followed)  they could stretch a meal and a dollar, but that food, filled with love,  tasted so wonderful and could fill you up and warm you up like nobody’s business.  Boy do we know it’s summer, (118 degrees F today) but that warm you up feeling was truly something special and nothing did that better or said “grandma” more, than our last post, which was, grilled cheese and tomato soup.  Traci’s grandma was ahead of her time; adding different cheeses, serving sandwiches open-faced and utilizing great bread fresh from the bakery.  This is another of those traditional staples that screams for you to make your own version and pass down to the next generation.  Let us know here on MDFs comment page or on MDF’s Facebook page how you are going to put your stamp on grilled cheese and tomato soup.

Creamy Tomato Soup by Modern Day Forager

Grilled Cheese and Tomato Soup by Modern Day Forager

Pardon me while I get on my soapbox for a moment, I have an ax to grind, and Traci and Heather have bees in their bonnets.  These days’ families don’t spend enough quality time together and we are losing traditions left and right.  Slow the fork down and start sharing what you hold dear from your grandma’s table and start a few traditions at your table… you will never be sorry you did, you heard that straight from the horses mouth.

Just a few more things to ponder, I thought I was done but haste makes wasteThat crazy jello salad thing (Ewww)…did grandma like burnt toast or was she taking one for the team?  Did we really need rice in the salt to keep it from sticking, or the apple in the potato bag to keep them from sprouting?  The bread in the brown sugar sure worked though, so did that tip about putting vinegar in a pie crust to make it flaky.  Does warm 7-up really fix anything that is wrong with your tummy?  Bacon grease, who didn’t have a can of it under the sink and a tupperware in the ice box

Ok, we have to skedaddle… no more piddling around with this post…Monday’s post is waiting to be photographed.

Things grandmas say by Modern Day Forager

//

// This Pinterest Hover Button is brought to you by bloggersentral.com.
// Visit http://www.bloggersentral.com/2012/11/pinterest-pin-it-button-on-image-hover.html for details.
// Feel free to use and share, but please keep this notice intact.
google-site-verification: googled91e15ba1a57c227.html

Grandma’s Donuts

HeatherGill-25

Recipes by Rj of Urban Table

Photo Styling & Art Direction by Traci of Urban Table

Photography & Art Direction by Heather of Heather Gill Photography

Donuts-3

Donut or Doughnut …no matter how you spell it, there may be nothing more satisfying to put in your mouth than a hot and fresh one of these old fashioned, hand-cut pieces of fried dough.

Ingredients:

  • • 4 cups flour
  • • 1 cup sugar
  • • 1 1/2 teaspoon salt
  • • 2 tablespoon baking powder
  • • 1/4 teaspoon nutmeg
  • • 1 cup milk
  • • 2 eggs, beaten
  • • 1 quart oil for frying

Powdered sugar and/or cinnamon sugar (I liked to switch off, while grandpa stuck with plain dunked into his coffee)

Donuts-6

Directions:

Pre-heat oil in a large Dutch oven or pot to approximately 375 F.

Combine flour, sugar, salt, baking powder and nutmeg.

Stir in milk and eggs.

(This step was done by hand on a large floured cutting board in grandma’s kitchen) Divide dough into easy to work with portion and spread out to about 1/4 inch thickness.

Cut out donuts (Grandma use two biscuit cutters to cutout donuts. She did not make donut holes so she just kept re-using the center piece.)

Once you have cut out all your donuts drop them into hot oil, just a few at a time. Fry about 3 minutes, turn and fry for about 3 more minutes or until golden brown.

Drain: (Grandma always tore a brown paper bag and set that on a plate to drain the donuts… never really a necessary step since my grandfather and I ate them as fast as she could make them, which always created plenty of giggles.)

Sprinkle with powdered sugar, cinnamon-sugar, or neither, just plain.

Eat and enjoy! 

Donuts-1

Modern Day Forager