Grandma Week Wrap-up
Grandma Week Wrap-up

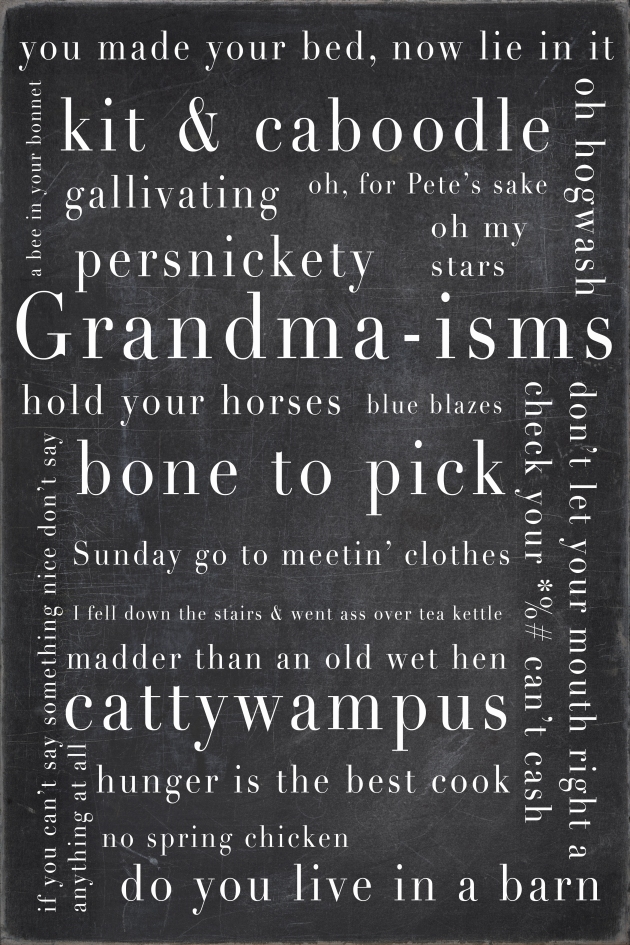
Grandma-isms by Modern Day Forager

It is with both trepidation and sorrow that we bid Grandmothers’ week ado!  We have had such a wonderful time just jabbering about our grandparents (hmmm… could a Grandfathers week be in the making?) and sharing just a fraction of those memories with each other and in turn our followers/you.

We started our week with a brief history of our grandmas’ and the incredible influences they had on us as people and as chefs, then we asked for your input and stories, thank you again, to those of you that shared with us.  Your stories just re-emphasized our belief that these women shaped our future, one generation at a time, from what we think to what we eat, from what we say to how we say it and the whole time with humor and love sprinkled in for good measure.

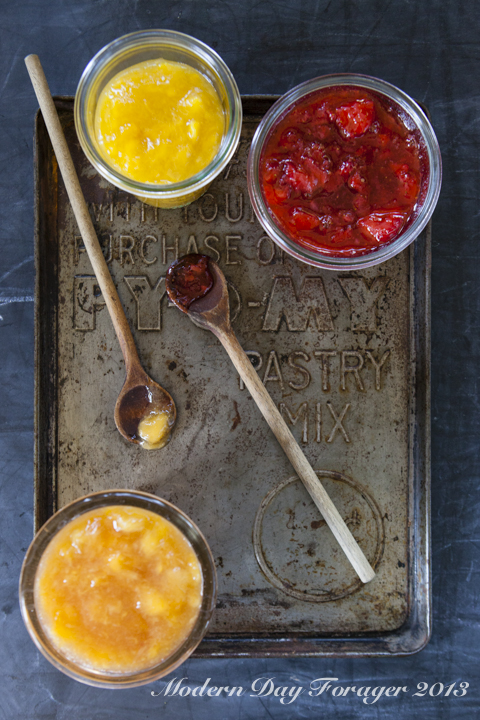
Next we dove into summer (and head first into Heather’s grandma’s freezer) with a tasty, super simple and incredibly versatile freezer jam that just may become one of the things your grandchildren look fondly back on, that you made for them every summer.

Simple Freezer Jam by Modern Day Forager

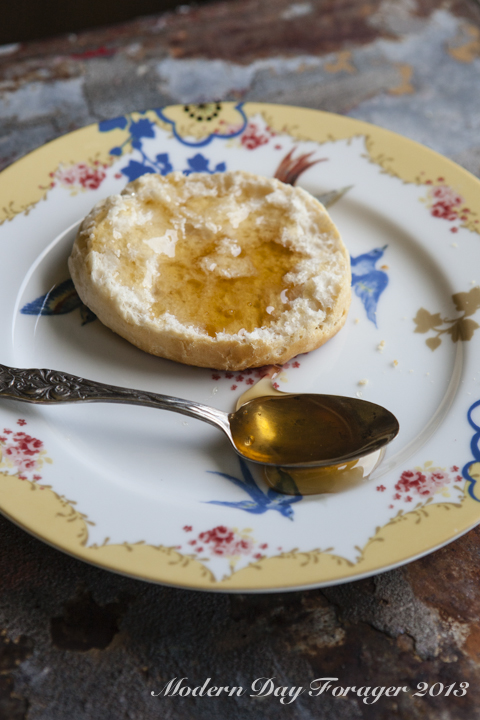
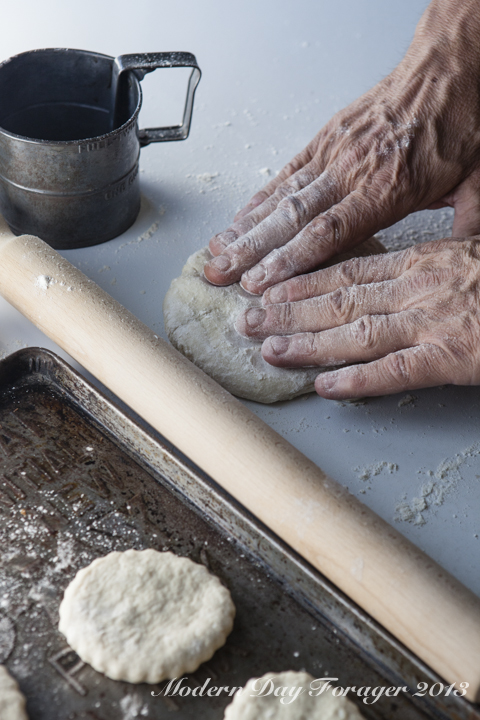
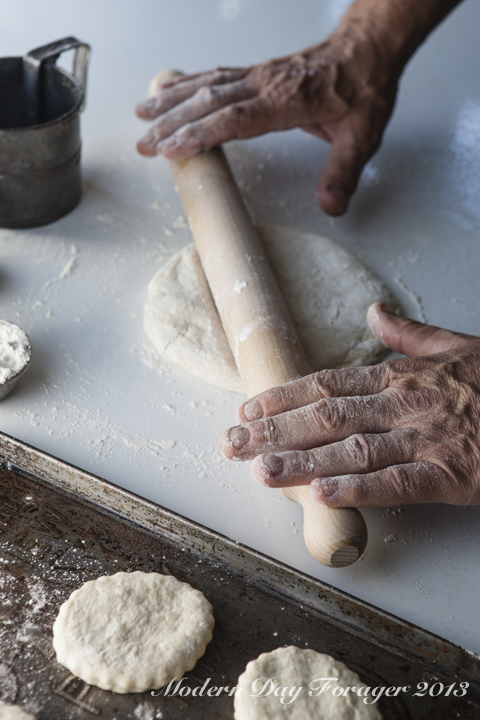
Every meal that came to my grandmother’s table included bread and butter, you may ask, “what does that have to do with the price of tea in China” let me tell you… no bread brought more smiles than fresh from the oven biscuits and oh by the way, what goes great with all that freezer jam?  That’s right…biscuits!
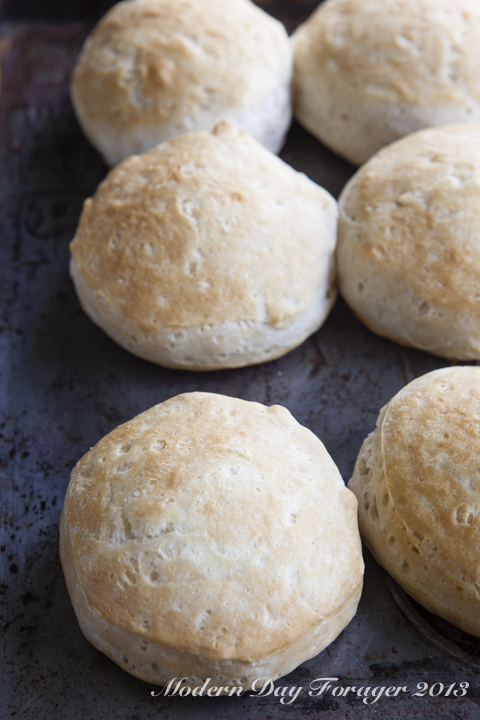
Grandma's Biscuits by Modern Day Forager

Grandma's Biscuits by Modern Day Forager

It didn’t take us long as we tested our biscuit recipe to decide the next recipe had to be strawberry shortcake. The biscuits make a wonderful vehicle for the sweet summer berries and will hold up to copious amounts of whipped cream and syrup.  Start with grandma’s basic and put your own spin on it.  Balsamic whipped cream, balsamic and black pepper syrup add fresh basil to any or all the ingredients, let your imagination run wild and take our tradition and create yourself a new one.

Strawberry Shortcake by Modern Day Forager

The next stop was back in my Grandma’s kitchen.  Breakfast was always a treat whether it was pancakes, waffles, eggs any number of ways (my favorite, and to this day unduplicated, a Swedish egg dish called rara) occasionally (if it didn’t break the bank) my favorite dry cereal or on the best of days… home made donuts.  Grandma would carefully make the dough, then cut them out on a giant cutting board, then fry 3 or 4 at a time in a big cast iron pot, finally setting them cattywampus on an old brown paper bag to drain … I would be in charge of bringing the warm donuts to the breakfast nook where my grandfather and I would devour them before the next batch was done frying.  I would alternate between powdered sugar, cinnamon sugar and just plain granulated sugar, the whole kit and caboodle, while my grandfather took his plain to dunk in his coffee from the percolator…how could a morning get any better?  I don’t want to sound like a broken record  (do you sense a secondary theme here) but what a great opportunity for you to put your own twist on these magic pieces of fried dough and create a tradition.

Grandma's Donuts by Modern Day Forager

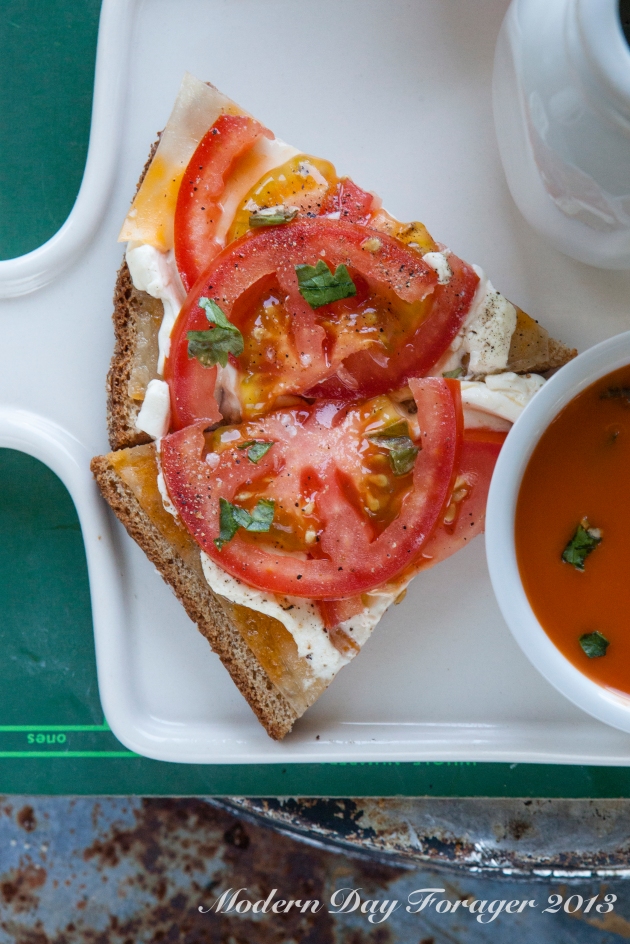
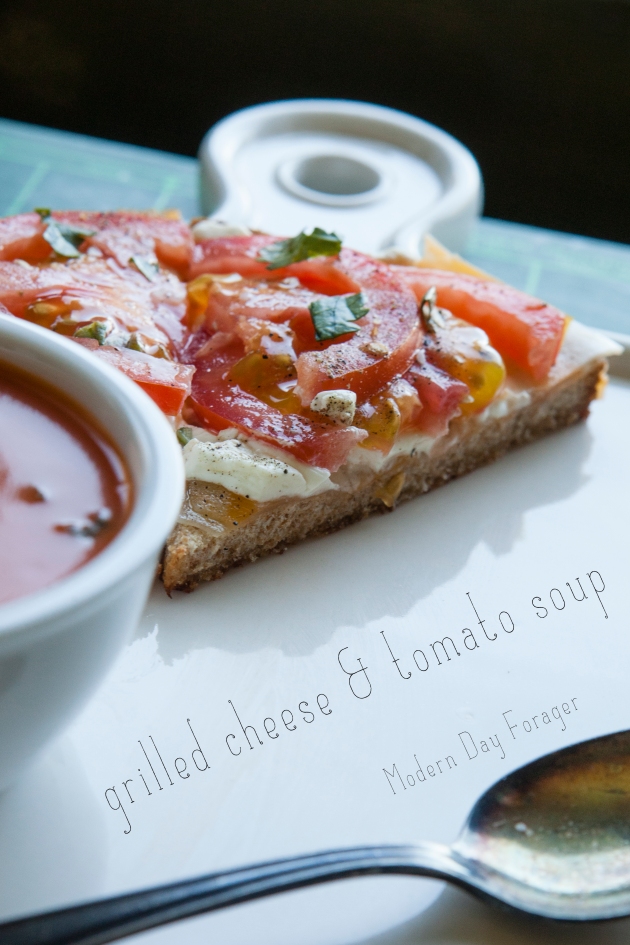
We hope that everyone understands our grandmothers’ where not disciples of Julia Child, they were not gourmands’, four of these women (not Heather’s she is the spring chicken of the MDF family) lived and fed families through The Great Depression (when hand-made, home-made, recycled, re-used, and re-purposed were a way of life not a trend to be followed)  they could stretch a meal and a dollar, but that food, filled with love,  tasted so wonderful and could fill you up and warm you up like nobody’s business.  Boy do we know it’s summer, (118 degrees F today) but that warm you up feeling was truly something special and nothing did that better or said “grandma” more, than our last post, which was, grilled cheese and tomato soup.  Traci’s grandma was ahead of her time; adding different cheeses, serving sandwiches open-faced and utilizing great bread fresh from the bakery.  This is another of those traditional staples that screams for you to make your own version and pass down to the next generation.  Let us know here on MDFs comment page or on MDF’s Facebook page how you are going to put your stamp on grilled cheese and tomato soup.

Creamy Tomato Soup by Modern Day Forager

Grilled Cheese and Tomato Soup by Modern Day Forager

Pardon me while I get on my soapbox for a moment, I have an ax to grind, and Traci and Heather have bees in their bonnets.  These days’ families don’t spend enough quality time together and we are losing traditions left and right.  Slow the fork down and start sharing what you hold dear from your grandma’s table and start a few traditions at your table… you will never be sorry you did, you heard that straight from the horses mouth.

Just a few more things to ponder, I thought I was done but haste makes wasteThat crazy jello salad thing (Ewww)…did grandma like burnt toast or was she taking one for the team?  Did we really need rice in the salt to keep it from sticking, or the apple in the potato bag to keep them from sprouting?  The bread in the brown sugar sure worked though, so did that tip about putting vinegar in a pie crust to make it flaky.  Does warm 7-up really fix anything that is wrong with your tummy?  Bacon grease, who didn’t have a can of it under the sink and a tupperware in the ice box

Ok, we have to skedaddle… no more piddling around with this post…Monday’s post is waiting to be photographed.

Things grandmas say by Modern Day Forager

//

// This Pinterest Hover Button is brought to you by bloggersentral.com.
// Visit http://www.bloggersentral.com/2012/11/pinterest-pin-it-button-on-image-hover.html for details.
// Feel free to use and share, but please keep this notice intact.
google-site-verification: googled91e15ba1a57c227.html

Open Faced Grilled Cheese with Creamy Tomato Soup

Grilled Cheese and Tomato Soup by Modern Day Forager

Recipes by Rj of Urban Table
Photo Style & Art Direction by Traci of Urban Table

Photography & Art Direction by Heather of Heather Gill Photography

Tomato Soup by Modern Day Forager

One of my most cherished memories of eating an open faced grilled cheese sandwich,  a steamy bowl of creamy tomato soup and a cold glass of milk, is when I was a little girl and my GG , would lovingly prepare me this meal for me whenever I was sick, stayed home from school, or needed some extra TLC.  There is just nothing better than having your Grandma take care of you and her making your favorite comfort foods.  I could always count on her to do that for me and make me feel special.   As a I grew older, the tables had turned , and I was the one lovingly preparing this recipe for my GG to comfort her when she was ill.  I will always be very grateful for the time I got to spend with her.

Ingredients:

For the creamy tomato soup:

  •             4 lbs. ripe heirloom tomatoes
  •             2 T olive oil
  •             1 T unsalted butter
  •             2 stalks celery, finely chopped
  •             1/3 cup shallots, finely chopped
  •             1/2 cup chicken stock, or as needed
  •             1 t fresh basil, chiffonade, extra for garnish
  •             1/2 t sugar
  •             1/2 cup heavy cream
  •              salt and freshly ground pepper to taste

Grilled Cheese and Tomato Soup by Modern Day Forager

For the grilled cheese: 

  • 3/4 lb. mild cheddar cheese, thinly sliced
  • 6 slices whole grain bread
  • 1/2 pound cream cheese, softened
  • 4 Tbs. unsalted butter, at room temperature

Directions:  To make the soup, preheat an oven to 400°F.  Lightly oil a rimmed baking sheet. Cut the tomatoes in half lengthwise and place them, cut side up, on the prepared baking sheet and brush with olive oil.  Roast until the tomatoes look somewhat shriveled, about 45-50 minutes.  Let cool for about 20 minutes.  Transfer the tomatoes and any juices to a food processor, pulse until chopped, then put the tomatoes and their juices through a food mill placed over a bowl.  You should have about 3 1/2 cups tomato purée.  Discard the contents and tomatoes skins from the food mill.
 
In a large saucepan, melt the butter over medium-low heat.  Add the celery and cook, stirring occasionally, until tender, about 5 minutes.  Add the shallots and cook, stirring occasionally, until softened, about 3 minutes.
 
Stir in the tomato purée, 1/2 cup stock, and the basil and bring to a simmer over medium-high heat.  Reduce the heat to medium-low and simmer, uncovered, for about 15 minutes.  Stir in the sugar. In 3 or 4 batches, transfer the soup to a blender and process until smooth.  Transfer to a clean saucepan; add the cream and heat until piping hot but not boiling.  If the soup seems too thick, thin with more stock.  Season to taste with salt, pepper and garnish with fresh basil leaves and serve warm.  To make the open face grilled cheese sandwiches; heat a griddle or 2 large frying pans over medium heat until hot.  For each sandwich, place one-fourth of the cheese on top of bread slice and top cream cheese, then layer with fresh tomatoes, season with salt, pepper and garnish with extra basil.  Place on the griddle, reduce the heat to medium-low and cook until the undersides are golden brown, 3–4 minutes.  Ladle the soup into warmed bowls.  Serve and enjoy!!!
Grilled Cheese and Tomato Soup by Modern Day Forager

Modern Day Forager

Grandma’s Donuts

HeatherGill-25

Recipes by Rj of Urban Table

Photo Styling & Art Direction by Traci of Urban Table

Photography & Art Direction by Heather of Heather Gill Photography

Donuts-3

Donut or Doughnut …no matter how you spell it, there may be nothing more satisfying to put in your mouth than a hot and fresh one of these old fashioned, hand-cut pieces of fried dough.

Ingredients:

  • • 4 cups flour
  • • 1 cup sugar
  • • 1 1/2 teaspoon salt
  • • 2 tablespoon baking powder
  • • 1/4 teaspoon nutmeg
  • • 1 cup milk
  • • 2 eggs, beaten
  • • 1 quart oil for frying

Powdered sugar and/or cinnamon sugar (I liked to switch off, while grandpa stuck with plain dunked into his coffee)

Donuts-6

Directions:

Pre-heat oil in a large Dutch oven or pot to approximately 375 F.

Combine flour, sugar, salt, baking powder and nutmeg.

Stir in milk and eggs.

(This step was done by hand on a large floured cutting board in grandma’s kitchen) Divide dough into easy to work with portion and spread out to about 1/4 inch thickness.

Cut out donuts (Grandma use two biscuit cutters to cutout donuts. She did not make donut holes so she just kept re-using the center piece.)

Once you have cut out all your donuts drop them into hot oil, just a few at a time. Fry about 3 minutes, turn and fry for about 3 more minutes or until golden brown.

Drain: (Grandma always tore a brown paper bag and set that on a plate to drain the donuts… never really a necessary step since my grandfather and I ate them as fast as she could make them, which always created plenty of giggles.)

Sprinkle with powdered sugar, cinnamon-sugar, or neither, just plain.

Eat and enjoy! 

Donuts-1

Modern Day Forager

Strawberry Shortcake

grandma-22

Recipes by Rj of Urban Table

Photo Styling & Art Direction by Traci of Urban Table

Photography & Art Direction by Heather of Heather Gill Photography

grandma-21

Strawberry Shortcake

Ingredients:

4 cups fresh strawberries – tops cut off and sliced thinly (remove 1/2 cup and mash)

1/2 cup sugar

Directions:

Combine 1/2 cup sugar and 1/2 cup crushed strawberries.  They will be syrupy.  Add this to the remaining sliced strawberries.  Serve over biscuits and top with fresh whipped cream.

Whipped Cream

Ingredients:

· 1 cup heavy cream

· 1 tablespoon confectioners sugar

· 1 teaspoon Vanilla extract

Directions:

In a large bowl, whip cream until stiff peaks are just about to form. Beat in vanilla and sugar until stiff peaks form.  Make sure not to over-beat, or you will have butter.

grandma-24

We used the biscuits from yesterdays post.  In case you didn’t catch it here is the recipe again.

Gran’s biscuits are all gussied up with macerated strawberries and old fashion whipped cream.  Change up the ingredients and embellish with 1/2 cup of crumbled bacon and 1 cup of buttermilk to the dough and now you have a rich and creamy savory biscuit

Grandma’s Biscuits

Ingredients:

1/2 cup leaf lard, cold and coarsely chopped plus more to grease pan

2 1/4 teaspoons active dry yeast

1/4 cup of warm water (105F-110F)

2 1/2 cups all purpose flour

2 tablespoons sugar

1 teaspoon salt

1 teaspoon coarse pepper

3/4 teaspoon cream of tartar

1 1/2 teaspoons baking soda

1 cup yogurt

Directions:

  1. Preheat oven to 425F.  Grease baking sheet with lard and set aside.
  2. In a small bowl, dissolve yeast in warm water, let stand until it becomes foamy (5-10 minutes).
  3. In a large bowl, combine the flour, sugar, baking powder, salt, pepper, cream of tartar and baking soda.  With a pastry blender or two knives, cut the lard into the flour mixture until pea sized coarse crumbs form.
  4. Make a well in the center of the flour mixture, add yogurt and yeast all at once and carefully toss with a fork until just moistened, careful to not over mix.
  5. Flour your work surface; roll out the dough to 3/4 of an inch thickness using a rolling pin.
  6. Cut the biscuits using a 2 1/2 inch round biscuit cutter.  Gather trimmings re-roll and cut.
  7. Place biscuits 1 inch apart on the prepared baking sheet.  Bake for 12-15 minutes until golden brown.  Leave to cool for 5 minutes on wire rack, serve warm.*** For a MDF take on Grandma’s Classic ***Replace vanilla extract with balsamic vinegar or any of your favorite extracts and/or bitters, then for an urban table twist try a chiffonade of basil.

grandma-23


Modern Day Forager

Grandma’s Biscuits

grandma-13

Recipes by Rj of Urban Table

Photo Styling & Art Direction by Traci of Urban Table

Photography & Art Direction by Heather of Heather Gill Photography

grandma-14

Here is a tried and true recipe from my dear grandma who made these by the dozens for my family and boy did we feel special when she made them and  we ate them.  If you master these biscuits and know your biscuit basics you will be on your way to making a mouth-watering golden brown biscuit with a soft and tender interior.

My Grandma’s Biscuits

1/2 cup leaf lard, cold and coarsely chopped plus more to grease pan

2 1/4 teaspoons active dry yeast

1/4 cup of warm water (105F-110F)

2 1/2 cups all purpose flour

2 tablespoons sugar

1 teaspoon salt

1 teaspoon coarse pepper

3/4 teaspoon cream of tartar

1 1/2 teaspoons baking soda

1 cup yogurt

  1. Preheat oven to 425F.  Grease baking sheet with lard and set aside.
  2. In a small bowl, dissolve yeast in warm water, let stand until it becomes foamy (5-10 minutes).
  3. In a large bowl, combine the flour, sugar, baking powder, salt, pepper, cream of tartar and baking soda.  With a pastry blender or two knives, cut the lard into the flour mixture until pea sized coarse crumbs form.
  4. Make a well in the center of the flour mixture, add yogurt and yeast all at once and carefully toss with a fork until just moistened, careful not to over mix.
  5. Flour your work surface; roll out the dough to 3/4 of an inch thickness using a rolling pin.
  6. Cut the biscuits using a 2 1/2 inch round biscuit cutter.  Gather trimmings, re-roll and cut.
  7. Place the biscuits 1 inch apart on the prepared baking sheet.  Bake for 12-15 minutes until golden brown.  Leave to cool for 5 minutes on a wire rack, serve warm.

grandma-23

Modern Day Forager

Simple Freezer Jam

grandma-8

Recipes by Rj of Urban Table

Photo Styling & Art Direction by Traci of Urban Table

Photography & Art Direction by Heather of Heather Gill Photography

grandma-10


We don’t know about your grandmas’ but ours made freezer jam every summer. We remember picking the fruit for grandma to use, she really didn’t get many since we were allowed to eat as we picked, but that was half the fun!

If you don’t like to can, this is for you.  Freezer jams use less sugar and you if you prefer you can omit pectin.  We are giving you 2 recipes today – one with pectin and one without.  We used Ball products for this jam, they have great plastic containers and we have always had success using their pectin for freezer and canned jams.

Freezer Jam – with pectin

4 cups strawberries or peaches (any fruit – peeled (if needed) and crushed)

1 1/2 cups sugar

1 package of freezer jam pectin

Combine all ingredients and put in plastic jars.  Let them set up for 30 minutes before putting them in the freezer.  Put one in the refrigerator a couple hours before you want to use.  And how simple that its no cook.

We love to eat this jam on homemade bread!  With fruit being just about perfect right now, this is something you could do tonight and use this weekend.

grandma-9


Our grandmothers would never have made mango lime but we would!  So for this one we put super ripe mangos and fresh limes without pectin together.

Freezer Jam – without pectin

4 cups mangos – peeled and crushed

Juice and pulp from 4 limes – we used a citrus reamer

1 1/2 cups sugar

Combine all ingredients in a medium sauce pan and cook on low for about 30 minutes.  Let cool for a bit (8-10 minutes) then add jam to plastic jars (we used Ball) and let cool completely before adding lids and transferring them to the freezer.  You can also cool them in a water bath if you like to speed up the process and keep them out of the danger zone, 40-140 degrees.

You can substitute almost any fruit with this.  We chose mango and lime together not only because its tasty but also because the lime helps with the natural pectin that is lower in mango.  Both of these recipes  would double well if you want to make a larger quantity.

We would love to know if your grandmother made jam.  Did you get to help?  And if so, what part did you play?  Please connect with us in the comments or on our Facebook page.

grandma-7

Modern Day Forager

Celebrating Our Grandmothers

Granny, grandma, grandmother, nana, nona. Whatever you called her we are celebrating her and time honored traditions this week.  For us at MDF, our grandmas centered around cooking, eating and family.   Their recipes were always lovingly prepared and harken back to a simpler time.  Everything depended on what was at hand, available and fresh in the garden and nothing was ever wasted.  No shortcuts were ever taken and many of the meals we have all grown so fond of, came out of the kitchen because of necessity to stretch a meal or a dollar.

grandma-2

Our grandmothers stories, recipes and wonderful anecdotes enriched our lives and awakened our love for food and feeding people.

grandma-5

grandma-4

Over the coming days we will share with you some charming stories, treasured family recipes, steeped in tradition and what we like to call “grandma-isms or  our version of grandma sayings.”   We would love to hear about your grandmother.  What do you remember about her?  Do you make recipes that she made for you as a child?  Please connect with us in the comments section or on our Facebook page.

grandma-1

vintage place mat photo by Bob’s Your Uncle

Modern Day Forager

Stone Fruit Week Wrap up…

stonefruit-5

Stone Fruit Week Wrap up…

I want to start this week’s wrap up off by giving you a glimpse behind the curtain at MDF and no I am not the wizard, that job falls squarely on the shoulders of Traci and Heather. There is a whole lotta love,  I mean thought, at least one meeting, (yes there’s food) several days of planning, recipe writing, recipe testing and then at least one, usually two days of food styling and photography.

When it came to the planning meeting for this week, stone fruit as our subject matter was a no brainer. Summer and stone fruit go hand in hand, for that matter stone fruit is summer in your hand.  If you never make a single one of these recipes, please at the very least take a bite out of as many of these drupes as you can get your hands/mouth on.

stonefruit-26

We started the week off with an intro to stone fruit and then on Tuesday we featured Nectarine Salsa, I am incredibly proud of this recipe, not only does it taste great, it highlights the nectarine and is a wonderful representation of how I like to cook. (Let the ingredients shine, equal balance of sweet and savory, presence of heat and several textures.)

Next we took a journey down south with a totally different take on the crumble… Our Peach and Cardamom Crumble takes advantage of a white peaches less acidic and sweeter taste paired with the herbal and citrus characteristics of cardamom to create a truly memorable dessert.

On Thursday we brought you Roasted Chicken with Pickled Cherries and Radish Sprouts… a sample of what happens when Traci and I start freethinking about a flavors.

“What does it pair with, what can we do to enhance its core qualities, what sounds wrong but tastes so right?”

stonefruit-22

Friday brings another dessert inspired by the south but with our MDF name all over it. The Caramelized Plum Tartlets are a great example of how to incorporate several textures into a dish thats featured ingredient is high on flavor but low on crunch.

For those of you wondering where the cocktail is, let me refer you back to cocktail week for the Crazy Jane … ok, ok I can’t help myself. A classic is begging to make an appearance here:

Apricot Bellini

Add 2 tablespoons of *apricot puree to a glass of chilled sparkling wine (Those of you that follow us, know we prefer Prosecco)

*Apricot Puree

4 apricots, pitted

1 tablespoon fresh lemon juice

1 teaspoon fresh lemon zest

1 teaspoon sugar

Place all the ingredients into your food processor and process until smooth. Force mixture through a sieve with a spoon then store in an air tight container in your refrigerator.

Caramelized Plum Tartlets

stonefruit-33-2

Recipes by Rj of Urban Table

Photo Styling & Art Direction by Traci of Urban Table

Photography & Art Direction by Heather of Heather Gill Photography

stonefruit-24

What better way to celebrate the summer and the end of our week than with an old fashion caramelized plum tartlet!

These deep purple and burgundy drupes are filled with a good source of fiber, potassium and vitamins A and C.  A real summer time treat.

Here is our take on how to use them.

Caramelized Plum Tartlets

2 cups all purpose flour

1 teaspoon baking powder

½ teaspoon ground cardamom

¼ teaspoon fine sea salt

½ lb. unsalted butter, room temp

2 large egg yolks

1 cup sugar

1 teaspoon hibiscus extract (we love lc finn’s extract)

1 teaspoon lemon zest

½ teaspoon ground cinnamon

6 plums pitted and sliced

½ cup turbinado sugar (you may substitute light brown sugar)

Powdered sugar as garnish

Directions:

  • Six 4 inch ramekins
  • Pre heat oven to 350 degrees.
  • Butter ramekins and place on baking sheet.
  • In medium sized mixing bowl combine flour, baking powder, cardamom and salt.
  • In a stand mixer with paddle attachment, cream butter on medium high for 2 min.  Add yolks, sugar, hibiscus extract, lemon zest and cinnamon then beat until incorporated.  Reduce speed to low and slowly add flour mixture, do not over mix.
  • Divide dough evenly between ramekins.  Fan plum slices over top of dough pressing them in lightly.  Sprinkle tops with turbinado sugar.
  • Bake for 25 to 30 min until tartlets look set and the tops are bubbly and caramelized to a golden brown.
  • Dust with powdered sugar.

***Serving suggestion lots of ice cream (MDF favorite, homemade black peppered goat cheese)***

We are just over the moon to share with you one of our knock out recipes.  The buttery crust is what makes this…something truly special and the graham cracker crumb like texture…is my favorite part of this rustic tart.  Out of this world!!!

Then when the sweet juicy plums are added, bubble to the top, the sugar caramelizes, turns golden brown, and the hibiscus extracts comes into play, the tart becomes so flavorful and intensifies everything in sight.   Once you make this tried and true recipe you will be sure to add it to your recipe collection.

stonefruit-25

stonefruit-18

Roasted Ginger Chicken w/ Pickled Cherries and Radish Sprouts

stonefruit-6

Recipes by Rj of Urban Table

Photo Styling & Art Direction by Traci of Urban Table

Photography & Art Direction of Heather Gill Photography

Ahhh, roasted chicken, an all star staple in the MDF kitchen.  Simple, juicy, crispy and succulent, it just doesn’t get better.   Starting with this tried and true classic, we created a pan sauce from the pan drippings and added fresh grated ginger and a nub of butter.

These all American true blue crimson lil orbs are bursting with unbeatable flavor, packed with antioxidants and credited with anti-inflammatory benefits and are the new super fruit.  We had a blast working with cherries.  They are not just for pies anymore.  So we decided to go outside the box and pickle cherries.  Yes, pickled.  We added a few sprigs of rosemary that imparted a rich fragrant earthy evergreen like flavor and then pink peppercorns that added a note of heat with a touch of fruitiness.  We are pleased as punch with this recipe.

stonefruit-1

Roasted Ginger Chicken w/ Pickled Cherries and Radish Sprouts

Ingredients:

1/4 cup butter, softened but not melted

1/2 teaspoon, ground cardamom

1 lemon, zested

1 Tablespoon grated ginger + 1 Tablespoon for pan sauce

Salt and fresh ground pepper

One 3 1/2- to 4-pound chicken

Olive oil

3/4 cup dry white wine, (if you wouldn’t drink it don’t cook with it)

2 Tablespoon butter

Directions:

If roasting immediately preheat the oven to 400 degrees F.

In a small bowl, combine the butter, ground cardamom, lemon zest, ginger, salt and pepper, to taste.  Stir together with a spoon until well mixed.

Hold chicken over sink and drain then pat dry inside and out with paper towels.  Poke a small opening in the clear membrane between the skin and the flesh of the over the breast and thighs gliding your index finger through the opening, loosening the skin from the flesh, without removing it completely.  You’re creating a big pocket for the butter.  Once the skin is loose, rub about three quarters of the ginger butter mixture under the skin, over the breast and thighs. Rub the rest inside the cavity.  You can now refrigerate for up to 2 days or cook immediately.  We like to refrigerate ours over night.  When you are ready to roast chicken smear the surface all over with about 1-teaspoon olive oil and season with salt and pepper.

Roast the chicken, (we like to use a shallow roasting pan that we can then use on the stove top for our pan sauce) after 30 min pour wine over chicken.  Roast and baste for an additional 30 to 60 minutes, until the juices run clear with only a trace of pink when you prick the thigh and a thermometer inserted in the thickest part of the thigh reads 170 degrees F.

Remove from oven and allow to rest, while you make a quick pan sauce.

In your roasting pan or a skillet, over a medium-high, heat the liquid remaining from roasting the chicken, plus the remaining tablespoon of grated ginger, salt and pepper.  Reduce liquid by half then whisk in butter and check seasoning, adjust if necessary.

  Pickled Cherries

 stonefruit-34


Ingredients:

3/4 cup filtered water

3/4 cup distilled white vinegar

1/4 cup sugar

2 teaspoon whole pink peppercorns

1 teaspoon coriander seeds

1/2 teaspoon crushed red pepper flakes

1 pound fresh cherries, stemmed and pitted

1 large rosemary sprig

Directions:

Boil first 6 ingredients in a medium pan, stirring to dissolve sugar.  Reduce heat and simmer 5 minutes.  Use a sieve to strain into a medium bowl then return liquid to pan.  Add cherries and rosemary to saucepan.  Simmer until cherries are tender, about 7 minutes.  Store cherries and rosemary in a re-sealable container and store in refrigerator for up to a month.

 stonefruit-10

Radish Sprout Salad Vinaigrette


Ingredients:

1/4 cup fresh lemon juice

2 cloves garlic, minced

2 teaspoons lemon zest

1/3 cup extra-virgin olive oil

salt and freshly ground pepper

Directions:

Add lemon juice, minced garlic and lemon zest to a mixing bowl and slowly whisk in extra virgin olive oil until combined.  Salt and pepper to taste.  Dress radish sprouts and top roasted chicken.

stonefruit-15