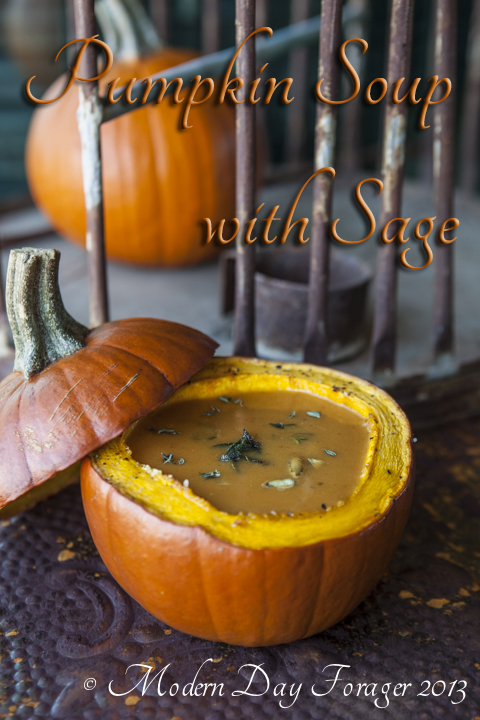
Creamy Velvet Pumpkin Soup with Crispy Sage

Pumpkin Soup with Sage by Modern Day Forager

Recipes by Rj of Urban Table
Photo Styling & Art Direction by Traci of Urban Table
Photography & Art Direction by Heather of Heather Gill Photography

MDF’s take on a creamy, velvety pumpkin bowl soup with crispy sage!

This soup will be sure to satisfy your winter cravings.  The perfect bowl of comfort, this warming soup is also a real crowd-pleaser.  As you know, we like to mix things up at MDF so we added Granny Smith apples for an underlieing tartness which adds freshness and cuts the richness of the pumpkin.  I am a soup gal, always have been and love soup for breakfast, lunch or dinner with a crusty loaf of hot bread.  I grew up in a house of soup artisans, there was always a pot of simmering goodness on the stove.  The smell filled our kitchen and was truly intoxicating .   If I wanted soup for breakfast my mom or grandmother were happy to oblige, going to school with a full belly of warm soup was just as good as a belly full of a hearty breakfast.  I have followed this tradition with my kids, they love the option of having soup for breakfast.  Enjoy this recipe it so easy to prepare and freezes beautifully.

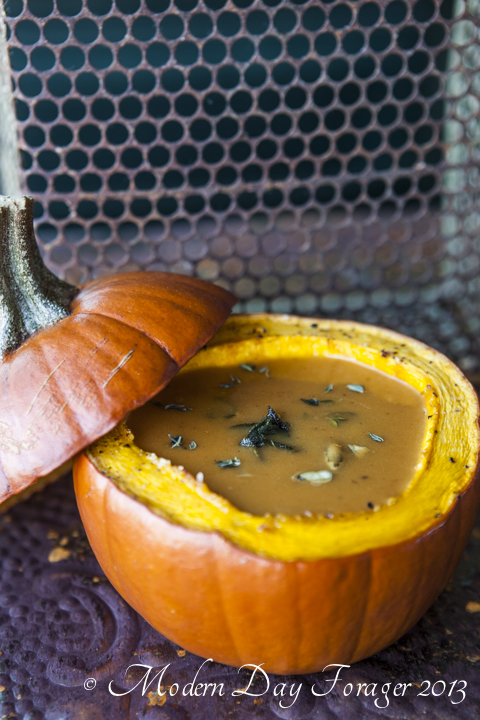
Pumpkin Soup with Sage by Modern Day Forager

 Pumpkin Soup with Sage

 Roasted Pumpkin for soup

Ingredients:

  • 1 medium sized sugar pumpkin
  • Olive Oil
  • Salt
  • Freshly Ground Black Pepper

Directions:

  1. Preheat oven to 375 degrees F.
  2. Cut whole pumpkin in half, scoop out the seeds, and quarter
  3. Place pumpkin quarters  on a baking sheet, drizzle with olive oil, season with salt and pepper.
  4. Roast until tender but not falling apart, approximately 45 minutes. Let cool, peel away meat, and cut into small dice.

Soup

 Ingredients:

  • 2 tablespoons butter
  • 1 onion, diced
  • 2 carrots, peeled and diced
  • 1  Granny Smith apple, peeled and diced
  • 2 cups roasted sugar pumpkin
  • 1 tablespoon sage leaves
  • 3 cups chicken stock
  • 2 teaspoons minced garlic
  • 1 teaspoon fresh thyme leaves (retain a pinch for garnish)
  • 1/8 to 1/4 teaspoon crushed red pepper
  • 2 teaspoons curry powder
  • 1/2 teaspoon ground coriander
  • Pinch ground cayenne pepper
  • 1 cup cream
  • Salt and freshly ground pepper
  • Fried sage leaves
  • Roasted papitas

Directions:

In a medium to large stockpot over medium heat, melt butter and sauté onion, carrot, apple, roasted pumpkin, and sage until tender, approximately 8 to 10 minutes.

Puree the mixture in a food mill (you can also use your food processor or blender.  (we just prefer texture from mill)

Return the puree to the stockpot, add the chicken stock and spices and simmer for 15 minutes.

Add cream and simmer for 10 more minutes. (do not boil)

Fry fresh sage leaves in olive oil in a small saucepan until rise to the top of oil and become crispy.

Season soup  with salt and pepper.

Garnish with crispy sage, roasted pepitas, and fresh thyme leaves.

Modern meets Old Fashioned…

Old Fashioned Pastrami Sandwich from Modern Day Forager

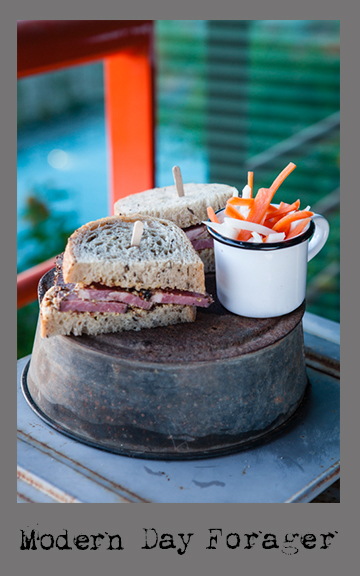
Modern’s Old Fashioned Pastrami on Rye

Paying tribute to an old fashioned deli masterpiece.  One of the simplest, most familiar, sandwiches is pastrami on rye, and for many, it is the king of all sandwiches.

Foolproof, this  rich silky, garlicky, peppery and piled sky-high pastrami needs no bells or whistles.  The magic happens, when crafting the meat– curing, spicing, crusting, smoking and steaming.  Then, all that is needed is soft chewy seeded rye, one that has some sourness to it, along with a dusting of cornmeal on the bread’s surface.  The bread must be warm (a must) and is the perfect vehicle to add a heaping helping of Modern’s Stout Mustard, which never disappoints.  So curate high-quality meat or make your own.  This iconic sandwich is as straight-forward as it gets, but provides a taste that you remember and want over and over, keeping  you coming back for more.

I could not blog about pastrami without mentioning my favorite place in the world to have this sandwich, and it is not even in NYC.  For me, Langer’s in LA, downtown LA no less, is  truly the very best.  It is a pastrami mecca, and the pastrami sandwich is taken very seriously at this landmark restaurant.  So, if you are ever in Los Angles, this is a must-have sandwich.

Langer’s Deli

704 S. Alvarado Street

Los Angles ,90057

+ 213.483.8050  langersdeli.com

Old Fashioned Pastrami with Stout Mustard by Modern Day Forager

Modern’s Old Fashion Pastrami on Rye

Ingredients:
  • 12 ounces thick cut pastrami  (Purchased from your local deli or make your own, recipes below)
  • 4 slices of rye bread
  • 2 tablespoons MDF Stout Mustard
  1. Place pastrami in a skillet over medium high heat.  Cook until fat of pastrami starts to steam, cover with two slices of rye bread.  Steam bread to warm, remove bread, flip over pastrami.   Cover with remaining rye bread and steam.
  2. On your work surface, place 2 slices of steamed rye bread and spread each with 1 tablespoon MDF Stout Mustard.  Layer each bread slice with 6 oz. thick cut pastrami; place two remaining slices of bread on top of pastrami.
  3. Enjoy! 

Variations:

  • Layer pastrami, sautéed onions and Thousand Island dressing on rye bread.
  • Top with house made cole slaw
  • Swiss Cheese
  • Horseradish sauce
  • Slice Pastrami thin and pile high

Home-Cured Beef Pastrami by Michael Ruhlman on Ruhlman.com

Ingredients:

  • 6 ounces or 3/4 cups kosher salt
  • 3 ounces or ½ cup sugar
  • 2 teaspoons pink salt, optional
  • 5 cloves garlic, smashed with the flat side of a knife
  • 4 tablespoons pickling spice
  • 1 5-pound beef brisket, the more fat it has the better

Rub:

Ingredients:

  • 1 tablespoon peppercorn, toasted and ground (or as needed)
  • 1 tablespoon coriander seed, toasted and ground (or as needed)

Directions:

  1. In pot large enough to hold brisket, combine 1 gallon/4 liters of water with kosher salt, sugar, sodium nitrite (if using), garlic and 2 tablespoons pickling spice.  Bring to a simmer, stirring until salt and sugar are dissolved. Remove from heat and let cool to room temperature, then refrigerate until chilled.
  2. Place brisket in brine, weighted with a plate to keep it submerged; cover.  Refrigerate for 2 days if it’s thin, a third day if it’s thick.
  3. Remove brisket from brine and rinse thoroughly.  Refrigerate it for another day uncovered (this is best, to let cure equalize, but if you can’t wait, that’s ok too).
  4. Combine the pepper and coriander and coat the brisket with it.   Smoke and cook the brisket, till tender, as described above.  Slice thinly to serve.  This will keep for a week in the refrigerated.  Steam it to reheat or reheat covered in a microwave (gently).

Pickling Spice

Ingredients:

  • 2 tablespoons black peppercorns
  • 2 tablespoons mustard seeds
  • 2 tablespoons coriander seeds
  • 2 tablespoons hot red pepper flakes
  • 2 tablespoons allspice berries
  • 1 tablespoon ground mace
  • 2 small cinnamon sticks, crushed or broken into pieces
  • 2 to 4 bay leaves, crumbled
  • 2 tablespoons whole cloves
  • 1 tablespoon ground ginger

Directions:

  1. Combine peppercorns, mustard seeds and coriander seeds in a small dry pan.  Place over medium heat and stir until fragrant, being careful not to burn them; keep lid handy in case seeds pop.  Crack peppercorns and seeds in mortar and pestle or with the side of a knife on cutting board.
  2. Combine with other spices, mix.  Store in tightly sealed plastic or glass container.

Pastrami Recipe for use with Smoker and Cherry Wood

Ingredients:

  • 1/2 cup kosher salt
  • 1/2 cup brown sugar
  • 1/4 cup black peppercorns
  • 4 tablespoons coriander seeds
  • 5 cloves garlic, smashed
  • 2 bay leaves
  • 5 to 6 pound brisket flat, trimmed
  • 1 qt beef stock
  • 2 12 ounce bottles of beer
  • 3/4  gallon cold water
  • 4 tablespoons pickling spices
  • 4 bay leaves
  • 2 tablespoons additional juniper berries
  • 2 tablespoons additional black peppercorns

Directions:

  1. Place peppercorns and coriander seeds in a grinder and grind until coarsely chopped.  Mix the salt, sugar, garlic, and ginger with the seasonings from the grinder.
  2. Reserve 1/4 of the seasonings.  Rub the flat thoroughly on all sides with seasonings.  Wrap in plastic wrap, then aluminum foil.  Place in a glass pan in the refrigerator.  Turn daily for at least one week, up to two weeks is better. Remove brisket from all wrappings.  Place on rack in pan so it can drain, and put uncovered in refrigerator  overnight, until very dry.
  3.  Prepare smoker with cherry wood at lowest temperature while still producing smoke.   Place cold flat in the smoker. Smoke for 3 hours,
  4. Remove  from smoker and place in a large dutch oven.  Cover  with  beef stock, beer and water.  Add the reserved rub, the pickling spice, the bay leaves, the additional juniper berries, and the additional black peppercorns.
  5. Simmer covered until tender about 3 hours.
  6. Remove from pot and slice. (cut across grain)
Recipes by Rj of Urban Table
Photo Styling & Art Direction by Traci of Urban Table
Photography & Art Direction by Heather of Heather Gill Photography


Modern Day Forager

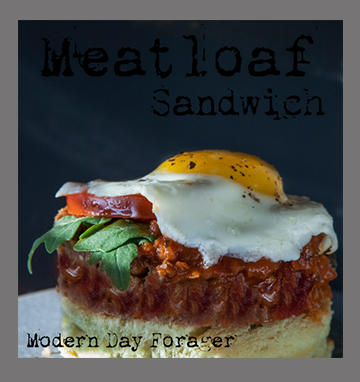
MDF Down Home Meatloaf …redefined

Meatloaf Sandwich by Modern Day Forager

MDF Down Home Meatloaf 

One of the best feel-good foods is our next go-to sandwich, the humble old fashioned meatloaf sandwich.  We would venture to guess, that just about every family has a recipe that has been handed down from generation to generation of this down-home classic.

With so many variations, this American staple may be customized to your liking, there are so many choices, such as the addition of oatmeal, crumbled cheese, hard-boiled egg, and even a blanket of bacon to keep the loaf moist, flavorful and tender, the options are endless.

Our mighty meatloaf is open-faced, packed with high-quality meat, our MDF ketchup, a rustic toasted roll, and if that wasn’t enough, we have crowned it with a fried egg.  It couldn’t be more comforting or satisfying.

The secret to making this recipe, is to keep the mixing and handling to a minimum, keeping the loaf moist and tender.  Our tasty tangy ketchup adds to the moistness and the concentrated flavor is hearty, thick and chunky.  Next, we added crisp peppery rocket leaves and juicy ripe heirloom tomatoes for a pop of freshness.  Then a farmer’s egg, which just takes it over the top, the runny yellow yolk, for us, makes it our ultimate comfort food.  The prep to plate for this tried-and-true classic takes no time at all and is worth making over and over.  Adding this recipe to your collection is a must.

MDF Down Home Meatloaf Sandwich

Ingredients:

  • Rustic style roll (we served our’s open faced and used the the bottom of the roll)
  • Generous slice of MDF Meatloaf (recipe below)
  • MDF Glaze (recipe below)
  • Rocket leaves to taste
  • Thick slice of Heirloom tomato
  • 1 egg
  • Salt and freshly ground black pepper

Directions:

  1. Butter bottom of roll and place butter side down on a griddle or medium heat skillet to toast.
  2. Brown meat loaf slice on both sides in 1 teaspoon of olive oil in skillet or on griddle until heated through.
  3. Fry sunny side up egg.
  4. Place meatloaf slice on toasted bread, top with MDF ketchup to taste then add tomato and rocket leaves.
  5. Top with fried egg.
  6. Season with salt and pepper.

Options for other toppings:

Fried onions, cheddar cheese, Monterey jack cheese, pepper jack cheese, sliced jalapenos, dill pickles, or bread and butter pickles.

Ingredients:

  • 1/2 
cup yellow onion, minced
  • 3 
cloves garlic, minced
  • 1
 tablespoon Worcestershire sauce
  • 3/4 cup fresh bread crumbs
  • 1/2
 pound ground beef
  • 1/2 
pound ground pork
  • 1/2
 pound ground veal
  • 1/2 
teaspoon salt
  • 1/2 teaspoon pepper
  • 1/2
 teaspoon fresh ground black pepper
  • 1
 egg, beaten
  • 1/2
 cup milk

Directions:

  1. Preheat oven to 350 F.
  2. In a large bowl, mix onion, garlic, Worcestershire and bread crumbs together.
  3. Combine ground meats with breadcrumb mixture.
  4. Season the meat mixture with salt and pepper.
  5. Add the egg and milk combine thoroughly, but don’t over work the meat.
  6. Use a greased loaf pan as your mold, (or use your hands to free form) fill it, lightly packing then turn the meatloaf out onto a lined baking sheet.
  7. Bake for approximately 90 minutes, glazing after 10 minutes, 30 minutes and 60 minutes.  Until the internal temperature is 160 degrees F and the meat loaf is cooked through.
  8. Once cooked, remove from the oven and let it cool, about 90 minutes.

Glaze:

  • 1/2 cup MDF Ketchup
  • 1 teaspoon cumin
  • 1 tablespoon honey
  • 1/4 teaspoon Worcestershire sauce
  • 1/4 teaspoon Tabasco sauce

Combine all the ingredients in a small bowl and spoon over the meatloaf after 10 minutes cooking time and again after 30 minutes and again at 60 minutes.

Meatloaf Sandwich by Modern Day Forager

Recipes by Rj of Urban Table
Photo Styling & Art Direction by Traci of Urban Table
Photography & Art Direction by Heather of Heather Gill Photography
Modern Day Forager

Modern’s take on Mustarda and Chimichurri

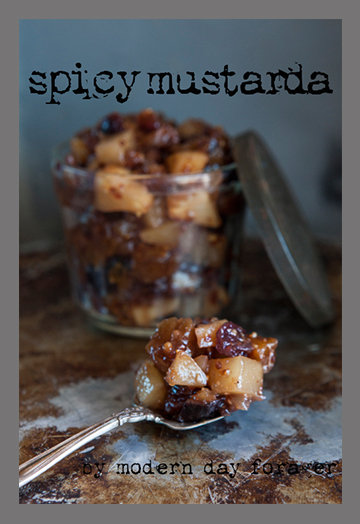
Spicy Mustarda by Modern Day Forager

This cherished (Sicilian) Italian condiment has many faces, made with fruit, (fresh, dried or candied) sugary syrup, wine and the essence of mustard, it is quite versatile.  The specialty dish, Bollito Mistro in northern Italy, traditionally served mustarda along side this hearty stew (similar to the French Pot-au-feu) as a celebration dish in the fall and winter.  It has gained popularity and made its way as an accompaniment on charcuterie, crusty breads, cheese boards, spooned over creamy polenta and it is equally delicious, crowned on poultry, game and fish.  It even adds a depth of savory piquancy and sweet flavor as a quick pan sauce or poured over ice cream.  Our favorite way to enjoy mostarda is to add it to a grilled salami and gruyere cheese sandwich, the mostarda just adds a richness and a spicy-sugary balance to the saltiness of the cheese and salami.  Yum!

 Spicy Mostarda

Ingredients:

• 1/2 cup dried apricots
• 1/2 cup dried cranberries
• 1/2 cup dried figs
• 1/2 cup dried cherries
• 1 shallot, minced
• 1 1/2 teaspoons minced crystallized ginger
• 1 cup dry white wine
• 1/4 cup honey
• 2  firm Bartlett pears, cubed
• 2 tablespoons of yellow mustard seeds
• 1 tablespoon mustard powder
• 1 teaspoon red pepper flakes
• Coarse salt and freshly ground pepper

Directions:

1.  Place the dried fruits, shallot, ginger, wine and honey in a medium saucepan and simmer for 10 minutes.
2.  Add pears, mustard seed and mustard powder and continue simmering for another 10 minutes.  (pears should soften but still hold shape)
3.  Season with red pepper flake, salt and freshly ground black pepper.
4.  We like our mustarda chunky here at MDF but if you prefer a thinner consistency you can puree part half the mixture and then mix for a medium chunk or puree the entire batch for a jam like consistency.
5.  Let the mustarda cool, place in a sealed container and store in the refrigerator.

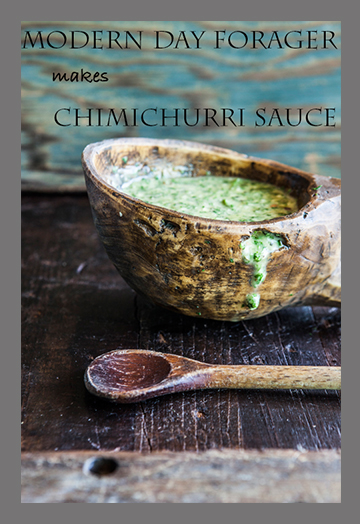
Chimichurri Sauce by Modern Day Forager

This acclaimed quintessential Argentinean sauce, chimichurri compliments grilled meats perfectly and is a crowd pleaser you should try for your next summertime gathering.  This fairly spicy sauce is bright, fresh and herbaceous with a garlicky, tangy punch.  Made of parsley, oregano,  garlic, shallots, vinegar, fresh lemon juice, red pepper flakes, and olive oil, this sauce really needs time to meld all of the flavors together, so make a day or two ahead of time, before you serve it.  Not only can you present this table side but if you don’t have the extra time to make it ahead, it also makes a easy and quick (that day) marinade for vegetable kabobs, beef, lamb, poultry,  fish and will really pop and heighten the flavor.

 Argentinian Chimichurri Sauce

Ingredients:

• 1 cup chopped Italian parsley
• 5 cloves garlic, chopped
• 1 teaspoon salt
• 1/2 teaspoon freshly ground pepper
• 1/2 teaspoon red pepper flakes
• 2 tablespoons fresh oregano leaves
• 1 shallot
• 3/4 cup olive oil
• 3 tablespoons sherry vinegar
• 3 tablespoons lemon juice

Directions:

1.  Place all chimichurri sauce ingredients in a blender or food processor and pulse until well chopped, but not pureed.
2.   Store in an airtight container in the refrigerator.

Plus it makes an incredible cheeseburger topping.  Try adding it to soups, stews and rice dishes, as well.

Recipes by Rj of Urban Table
Photo Styling & Art Direction by Traci of Urban Table
Photography & Art Direction by Heather of Heather Gill Photography

MODERN DAY FORAGER

An ode to ketchup and mustard…

We all know that ketchup and mustard are the king and queen reigning the condiment world, while we know there is something nostalgic about commercial brands, don’t leave it in the hands of Heinz and French’s.  Embrace making your own handcrafted customized concoctions.
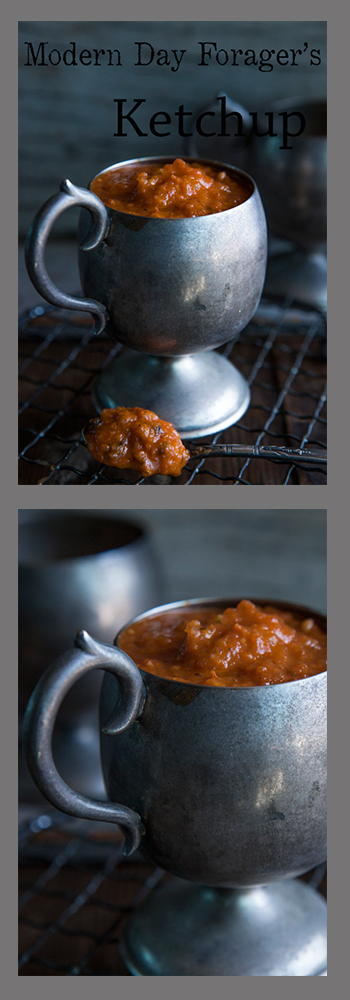
Ketchup by Modern Day Forager


Making ketchup is really quiet simple, and the flavor combinations are endless.  So why not?  If you have an abundance of tomatoes from your garden this summer, why not use these juicy orbs of goodness and build a better ketchup?

MDF FARM FRESH KETCHUP

Ingredients:

  • 1/4 cup Olive oil
  • 1 red onion, chopped
  • 1/2 small bulb fennel, chopped
  • 1 stalk celery, chopped
  • 1 tablespoon fresh ginger, peeled and chopped
  • 2 cloves garlic, minced
  • 1/4 teaspoon red pepper flakes
  • 1/4 cup fresh basil, chopped
  • 1 tablespoon coriander seeds
  • 2 cloves
  • 1 teaspoon salt
  • 1 teaspoon freshly ground black pepper
  • 3 pounds fresh tomatoes (experiment with your favorites)
  • 1 1/2 cups filtered water
  • 1 cup red wine vinegar (3/4 cup if you don’t want ketchup tangy)
  • 1/3 cup brown sugar

Directions:

  1. Place the first 12 ingredients in a large pot over a medium-low heat for 15 minutes stirring often.
  2. Add the tomatoes and 1 1/2 cups of water.  Turn heat to medium-high stirring often, until liquid is reduced by half.
  3. Pour mixture into a food processor and process until smooth, then pour mixture through a mesh sieve into a clean pot.
  4. Over medium heat stir in red wine vinegar and brown sugar, and reduce to the thickness you desire.
  5. Cool and then store in refrigerator.

If you prefer a chunky style, just omit the sieve step.

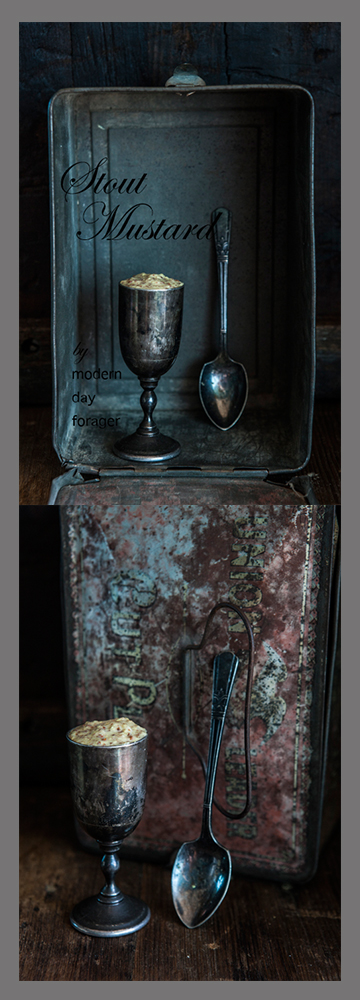
Stout Mustard by Modern Day Forager

Don’t hold the mustard or cut the mustard, make mustard!  This top dog condiment is surprisingly a cinch to make.  However, there are a few basics you need to understand about the process for making really good quality mustard.  First, the seeds need a good crushing and grind, and the key here is to add cold liquid (cold stout in this recipe) to add moisture to the mustard seeds.  Mustard gets its bite when the cracked seeds release volatile oils, much like capsaicin, the “hot” in chile peppers and when mixed with the liquid, the result is pungent and spicy.

Second, heat will temper the chemical reaction (much like cutting a onion) so, hot mustard, cold liquid, warmer liquid a more mellow mustard.  Also, in addition of the cold liquid remember that adding an acid is crucial to the recipe.  If you don’t add the acid, the mustard will lose its bite over time.  Adding vinegar, for instance, will stop and set the chemical reaction in place.

Mustard is extremely versatile, with many variations, it livens up and pairs well with sandwiches, cold meats, cheese, greens, burgers and hotdogs.  Rj and I are from Chicago and the only way to eat a dog is with mustard, sorry ketchup.  It also is a great emulsifying agent/stablizer for salad dressings, marinades, dips, sauces and spreads.  By making your own, you avoid all the goop of artificial flavors, fillers, colors and homemade just tastes better. 

MDF Extra Stout Mustard

 Ingredients:

  • 3 tablespoons yellow mustard seeds, crushed
  • 2 tablespoons brown mustard seeds, crushed
  • 1/3 cup Cold Guinness Extra Stout
  • 2 tablespoons white balsamic vinegar
  • 2 tablespoons honey
  • 1 small clove garlic, chopped
  • 1/4 teaspoon ground allspice
  • 1/4 teaspoon salt
  • 1/4 teaspoon fresh ground black pepper

Directions:

  1. Combine all of the ingredients in a large mason jar, cover and refrigerate overnight.
  2. Pour the ingredients into a food processor or blender and process until the seeds are broken down and you reach your desired consistency, it will thicken the more you process. (You may also use an immersion blender right in jar)
  3. Store in your refrigerator, for up to 2 weeks.
Recipes by Rj of Urban Table
Photo Styling & Art Direction by Traci of Urban Table
Photography & Art Direction by Heather of Heather Gill Photography
Modern Day Forager

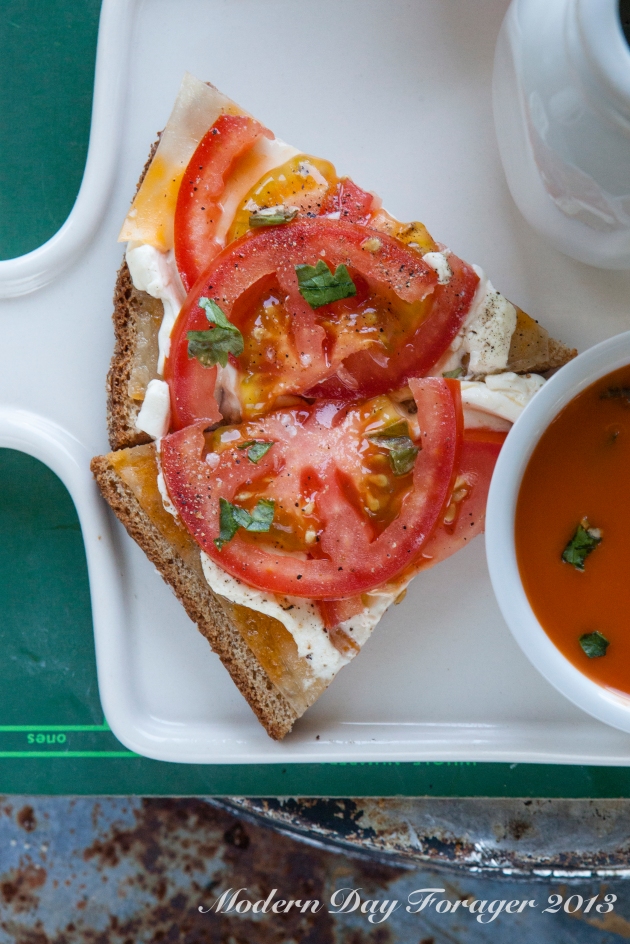
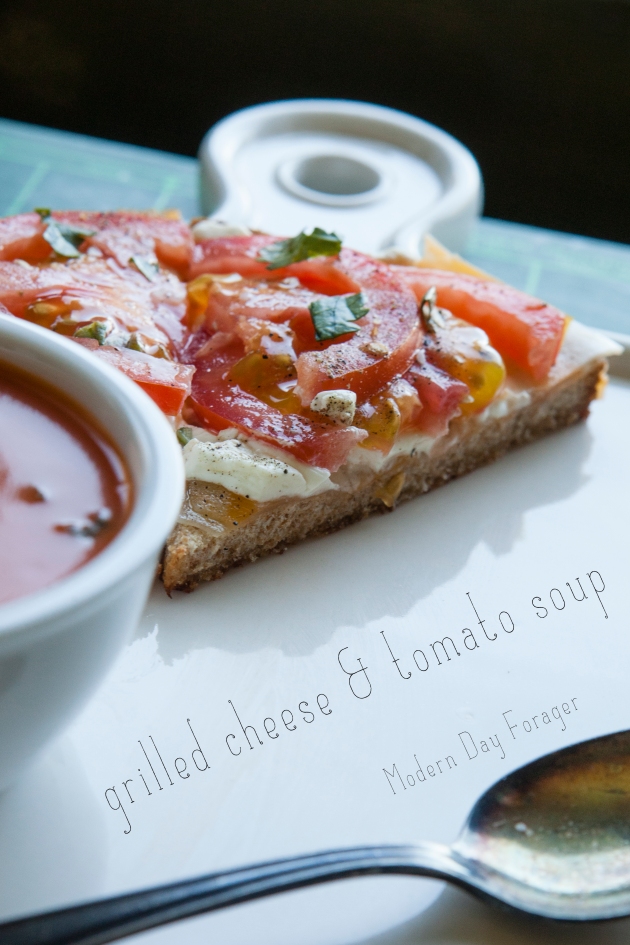
Open Faced Grilled Cheese with Creamy Tomato Soup

Grilled Cheese and Tomato Soup by Modern Day Forager

Recipes by Rj of Urban Table
Photo Style & Art Direction by Traci of Urban Table

Photography & Art Direction by Heather of Heather Gill Photography

Tomato Soup by Modern Day Forager

One of my most cherished memories of eating an open faced grilled cheese sandwich,  a steamy bowl of creamy tomato soup and a cold glass of milk, is when I was a little girl and my GG , would lovingly prepare me this meal for me whenever I was sick, stayed home from school, or needed some extra TLC.  There is just nothing better than having your Grandma take care of you and her making your favorite comfort foods.  I could always count on her to do that for me and make me feel special.   As a I grew older, the tables had turned , and I was the one lovingly preparing this recipe for my GG to comfort her when she was ill.  I will always be very grateful for the time I got to spend with her.

Ingredients:

For the creamy tomato soup:

  •             4 lbs. ripe heirloom tomatoes
  •             2 T olive oil
  •             1 T unsalted butter
  •             2 stalks celery, finely chopped
  •             1/3 cup shallots, finely chopped
  •             1/2 cup chicken stock, or as needed
  •             1 t fresh basil, chiffonade, extra for garnish
  •             1/2 t sugar
  •             1/2 cup heavy cream
  •              salt and freshly ground pepper to taste

Grilled Cheese and Tomato Soup by Modern Day Forager

For the grilled cheese: 

  • 3/4 lb. mild cheddar cheese, thinly sliced
  • 6 slices whole grain bread
  • 1/2 pound cream cheese, softened
  • 4 Tbs. unsalted butter, at room temperature

Directions:  To make the soup, preheat an oven to 400°F.  Lightly oil a rimmed baking sheet. Cut the tomatoes in half lengthwise and place them, cut side up, on the prepared baking sheet and brush with olive oil.  Roast until the tomatoes look somewhat shriveled, about 45-50 minutes.  Let cool for about 20 minutes.  Transfer the tomatoes and any juices to a food processor, pulse until chopped, then put the tomatoes and their juices through a food mill placed over a bowl.  You should have about 3 1/2 cups tomato purée.  Discard the contents and tomatoes skins from the food mill.
 
In a large saucepan, melt the butter over medium-low heat.  Add the celery and cook, stirring occasionally, until tender, about 5 minutes.  Add the shallots and cook, stirring occasionally, until softened, about 3 minutes.
 
Stir in the tomato purée, 1/2 cup stock, and the basil and bring to a simmer over medium-high heat.  Reduce the heat to medium-low and simmer, uncovered, for about 15 minutes.  Stir in the sugar. In 3 or 4 batches, transfer the soup to a blender and process until smooth.  Transfer to a clean saucepan; add the cream and heat until piping hot but not boiling.  If the soup seems too thick, thin with more stock.  Season to taste with salt, pepper and garnish with fresh basil leaves and serve warm.  To make the open face grilled cheese sandwiches; heat a griddle or 2 large frying pans over medium heat until hot.  For each sandwich, place one-fourth of the cheese on top of bread slice and top cream cheese, then layer with fresh tomatoes, season with salt, pepper and garnish with extra basil.  Place on the griddle, reduce the heat to medium-low and cook until the undersides are golden brown, 3–4 minutes.  Ladle the soup into warmed bowls.  Serve and enjoy!!!
Grilled Cheese and Tomato Soup by Modern Day Forager

Modern Day Forager

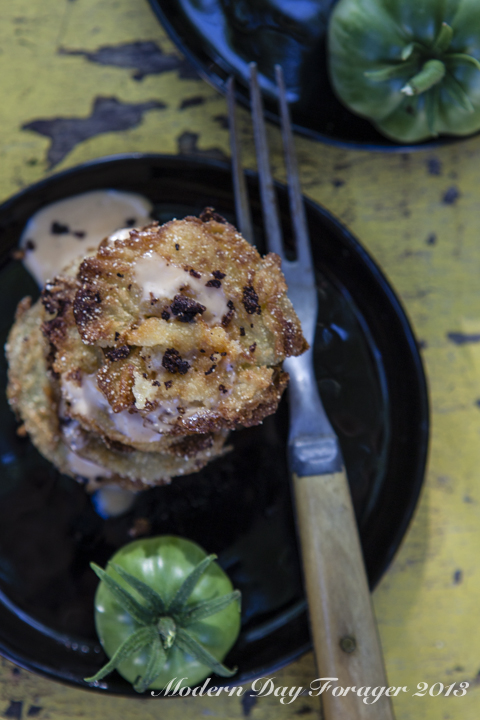
Fried Green Tomatoes

tomato-52

Recipes by: Rj of Urban Table

Photo Styling & Art Direction by: Traci of Urban Table

Photography & Art Direction by: Heather of Heather Gill Photography

tomato-46

Fried Green Tomatoes

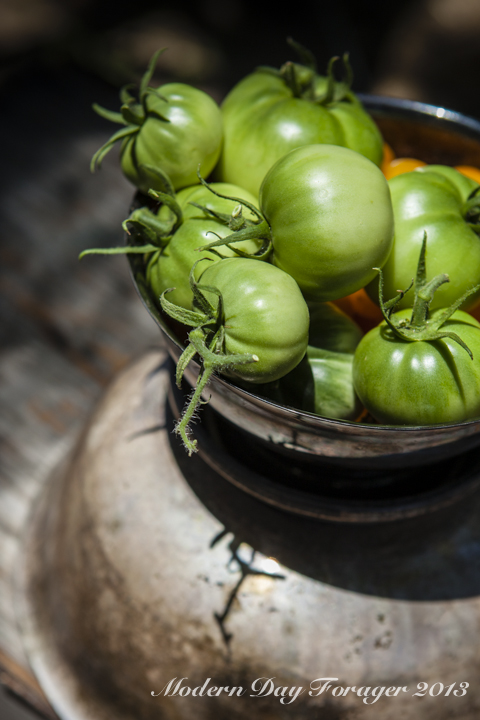
4 medium sized green tomatoes

kosher salt

1 quart buttermilk

1 teaspoon hot sauce (we used Tabasco sauce)

2 1/2  cups all-purpose flour

 1 cup cornmeal

2 1/2 tablespoons fresh ground black pepper

5 teaspoons salt

3 tablespoons lard (you can use a vegetable oil if you are averse to lard)

Directions:

  1. Sprinkle tomatoes with salt and refrigerate for 1 hour. Wash off salt in cold water.
  2. Lay tomatoes out in a container and cover with buttermilk and hot sauce.  Soak for about 8 hours.
  3. Combine flour, cornmeal, black pepper and salt in a shallow dish. (We use a pie plate)
  4. Heat lard in a cast iron skillet.
  5. Dredge tomato slices in flour mixture then back in buttermilk mixture then again in flour, shake off excess and place in hot oil.
  6. Fry for 2-3 minutes on each side until golden brown and then drain on a paper towel.

tomato-55

Simple Remoulade Sauce

1/2 cup mayonnaise

2 tablespoons Creole whole-grain mustard

1 tablespoon horseradish

1 tablespoon fresh squeezed lemon juice

1 teaspoon Worcestershire sauce

2 dashes Tabasco sauce

Combine all ingredients.  Refrigerate for at least 2 hours, flavor will get better the longer it sits.

Another simple classic sauce for Fried Green Tomatoes

1/2 cup mayonnaise

1/4 cup ketchup

1 minced clove garlic

1/4 teaspoon Worcestershire sauce

fresh ground black pepper to taste

Combine all ingredients.  Refrigerate for at least 2 hours, flavor will get better with time.

tomato-55

Classic Remoulade

1/4 cup fresh lemon juice

3/4 cup vegetable oil

1/2 cup chopped onion

1/2 cup chopped green onions

1/4 cup chopped celery

2 tablespoons chopped garlic

2 tablespoons prepared horseradish

3 tablespoons Creole whole-grain mustard

3 tablespoons prepared yellow mustard

3 tablespoons ketchup

3 tablespoons chopped parsley leaves

1 teaspoon salt

1/4 teaspoon cayenne pepper

1/8 teaspoon freshly ground black pepper

Combine all ingredients in the bowl of a food processor and process for about 30 seconds.  Refrigerate for at least 2 hours, flavor gets better with time and can be made ahead of time.

tomato-2

Modern Day Forager